By now, if you're still running with your original fuel pump you're likely on borrowed time. It wouldn't be the worst idea to proactively replace this somewhat hard to source part before it leaves you stranded. Or at a minimum, carry one in your van as a back-up. Your original pump is at least 28 years old as of this writing. The pump on our personal Vanagon lasted 31 years before it finally left our family of five + one grandparent stuck on the side of a four-lane Interstate. This happened out of town, at night, which resulted in a tow truck ride to a hotel, overnight stay, and scrambling to fix it in the hotel parking lot. Do you want to roll the dice?
If your pump fails you need to know why before installing a new one. Most commonly the pump fails due to being clogged with rust, dirt, etc., coming from an old fuel tank. If this is the case, you need to get a new fuel tank to prevent your new pump from failing for the same reason! These pumps are pretty robust, so if your pump has failed multiple times something else is going on. It's not the pump's fault if you keep clogging it with a dirty fuel supply. One tell-tale sign that something is amiss is that your pump will "buzz". If you ever hear this, this means cavitation has occurred and it will eventually fail if not addressed. You either need to replace the filter, clean out the pump, or both. Ultimately, this means you need to clean (or better yet, replace) your fuel tank and all associated seals and breather lines. There is only one way crud is making it into your filter or pump, and it starts with the tank.
The below instructions specifically apply to 2WD Vanagons. The overall process for 4WD Syncro Vanagons (and even late model Buses) will be similar, but their layout is slightly different due to the fuel tank being located in the rear of the vehicle instead of the front.
Supplies Needed:


BUY ON AMAZON HERE: https://amzn.to/4or5Nh2
OEM Bosch Fuel Pump - Best price of any Vanagon vendor! The price fluctuates between $90 - $110. Save $30+ bucks over the competition!
In the world of VW fuel pumps, Bosch is best.
Fitment:
Bus 1975 - 1979 fuel-injected
Vanagon 1980 - 1991 fuel-injected
NOTE: We do NOT carry inventory of this pump.
BUY HERE: https://amzn.to/4or5Nh2
See below for full product description.
Tools Needed:
Wire crimper, cutter, and/or stripper. We use this crimper/cutter and this wire stripper. They both work great for automotive and home projects.
Basic metric wrench set or you could probably get away with a small adjustable wrench in a pinch.
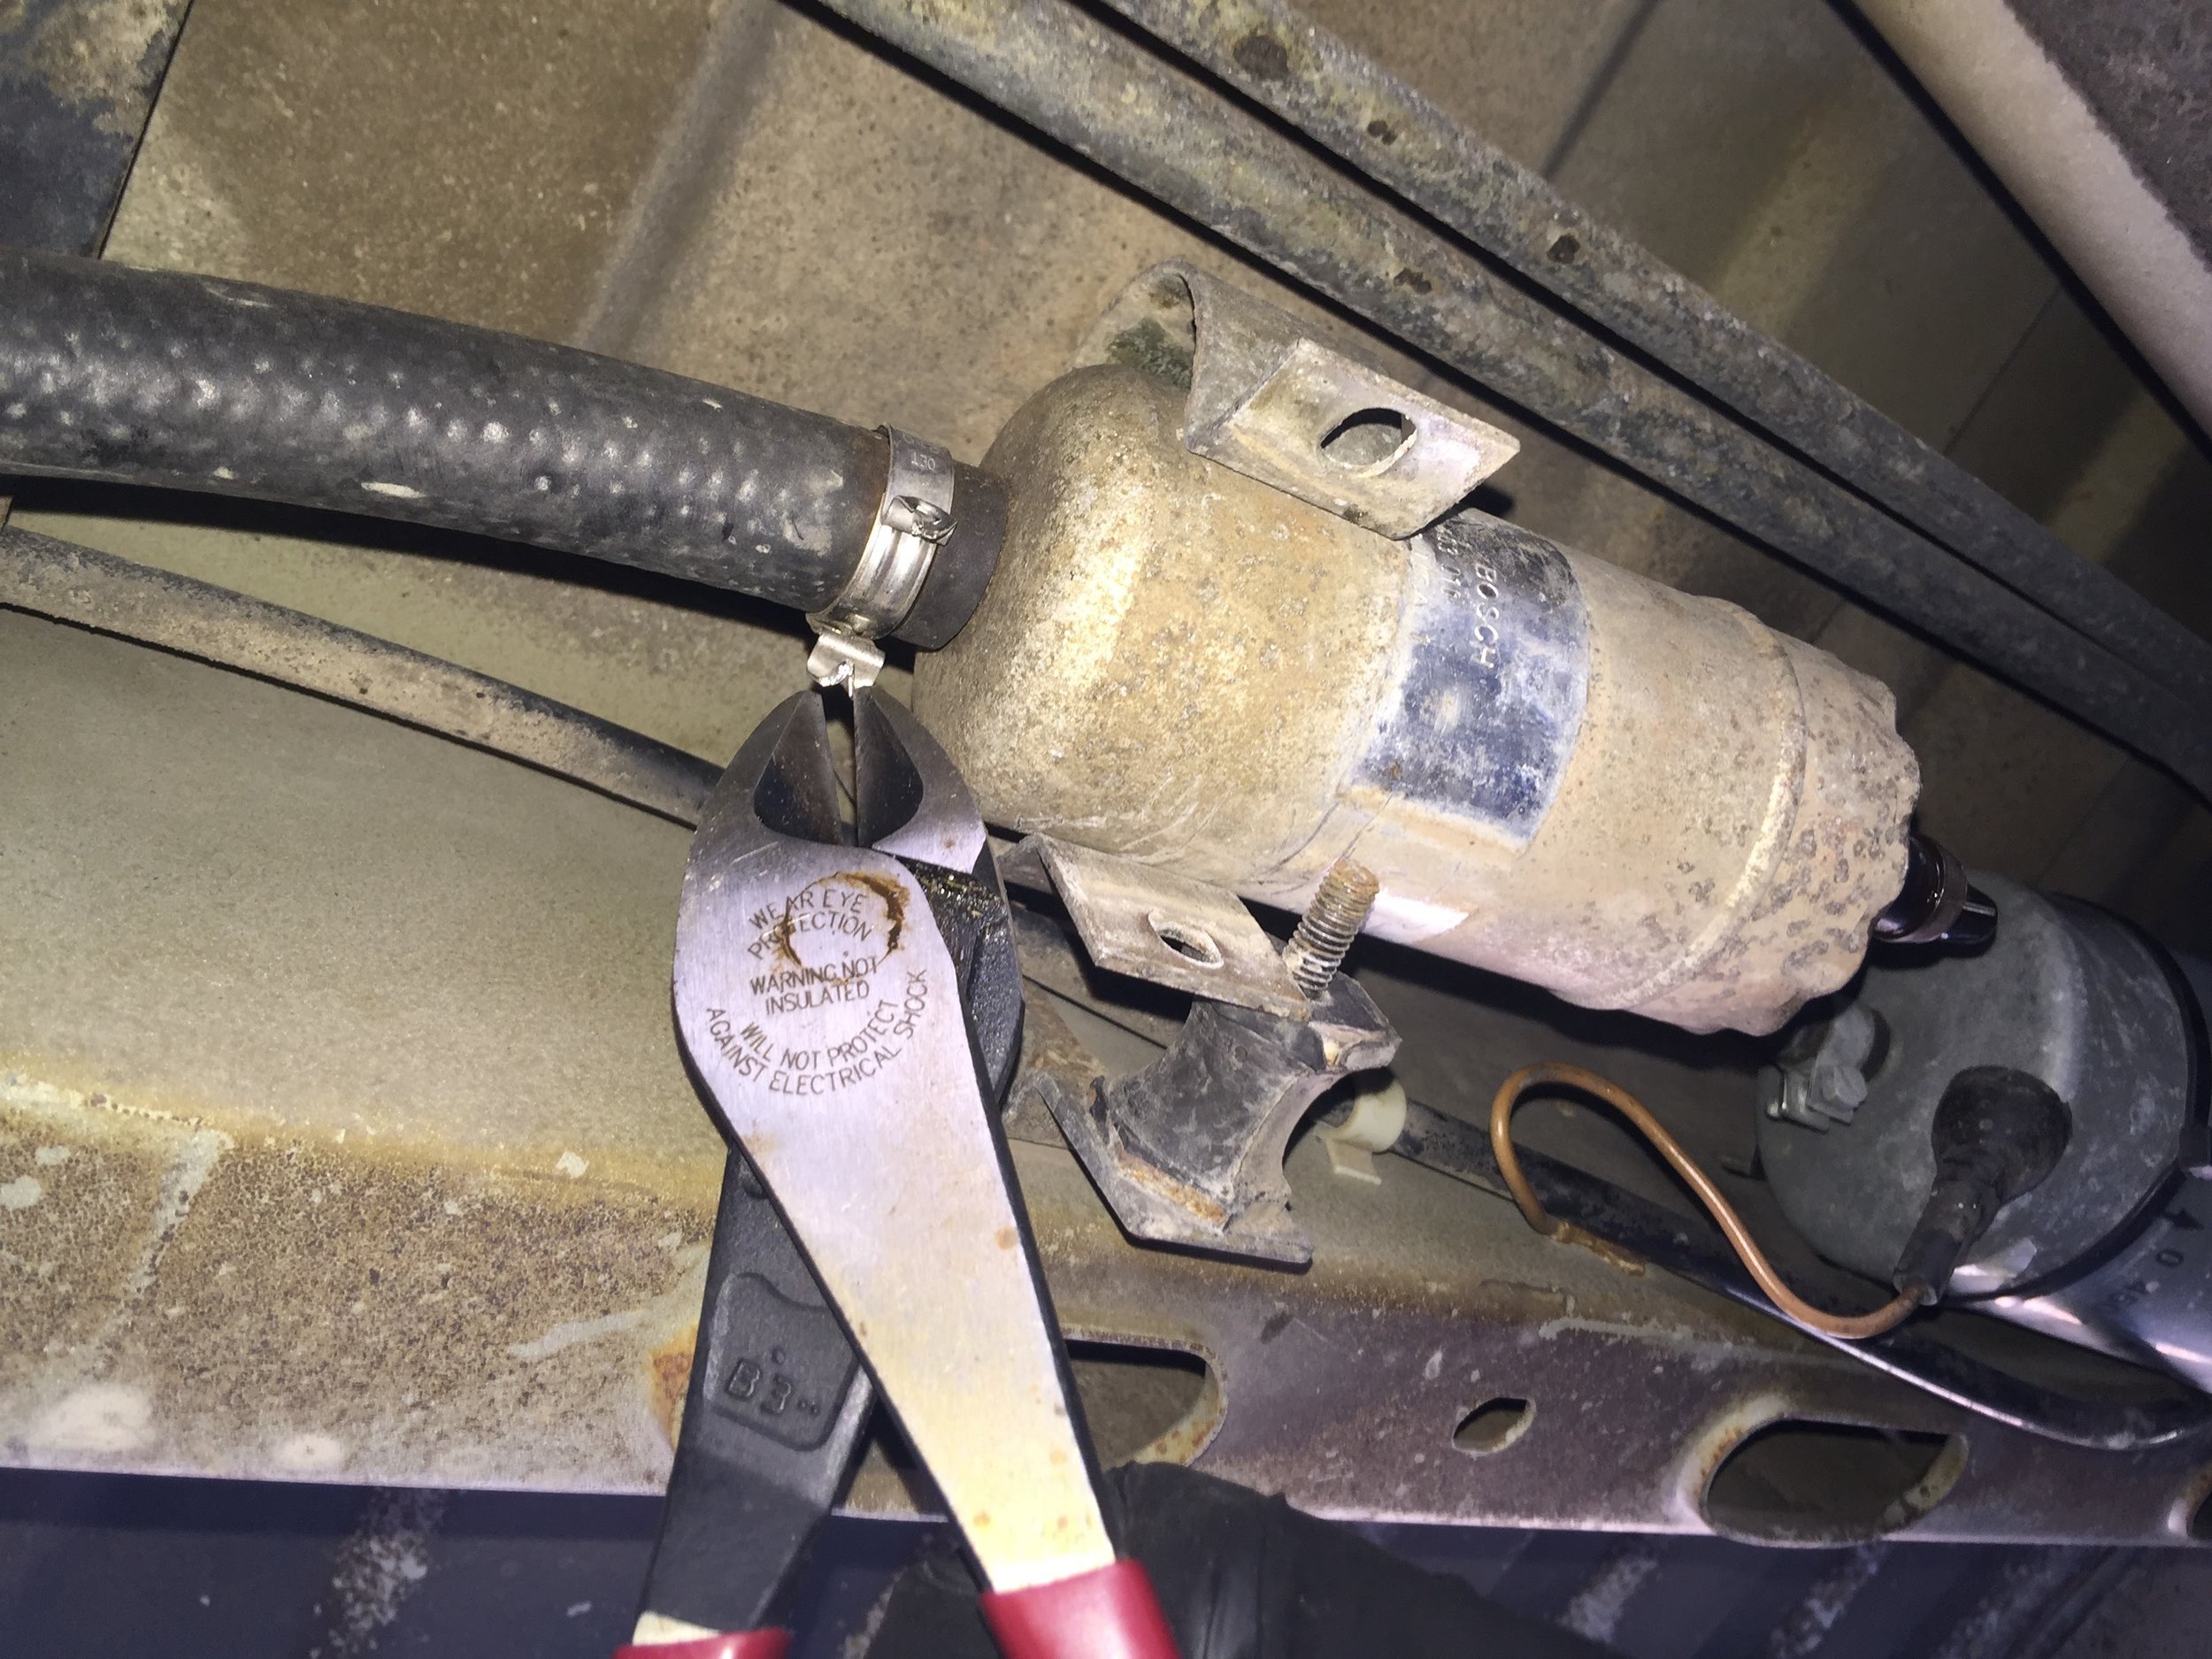
Diagonal cutters to remove the ear clamps (if you use them) on the fuel hoses. Or, a flat-head screwdriver to remove the screw clamps.
Replacement 21 mm ear clamp and 14.5mm or 15.7mm ear clamps for the two that you cut off. (These come with our fuel pumps if you buy ours.) Or, you could replace them with smooth-bore hose clamps if desired / needed.
Skill Level: Easy / Moderate
Before starting, please read our Disclaimer. By using this website you agree to these terms.
Comments:
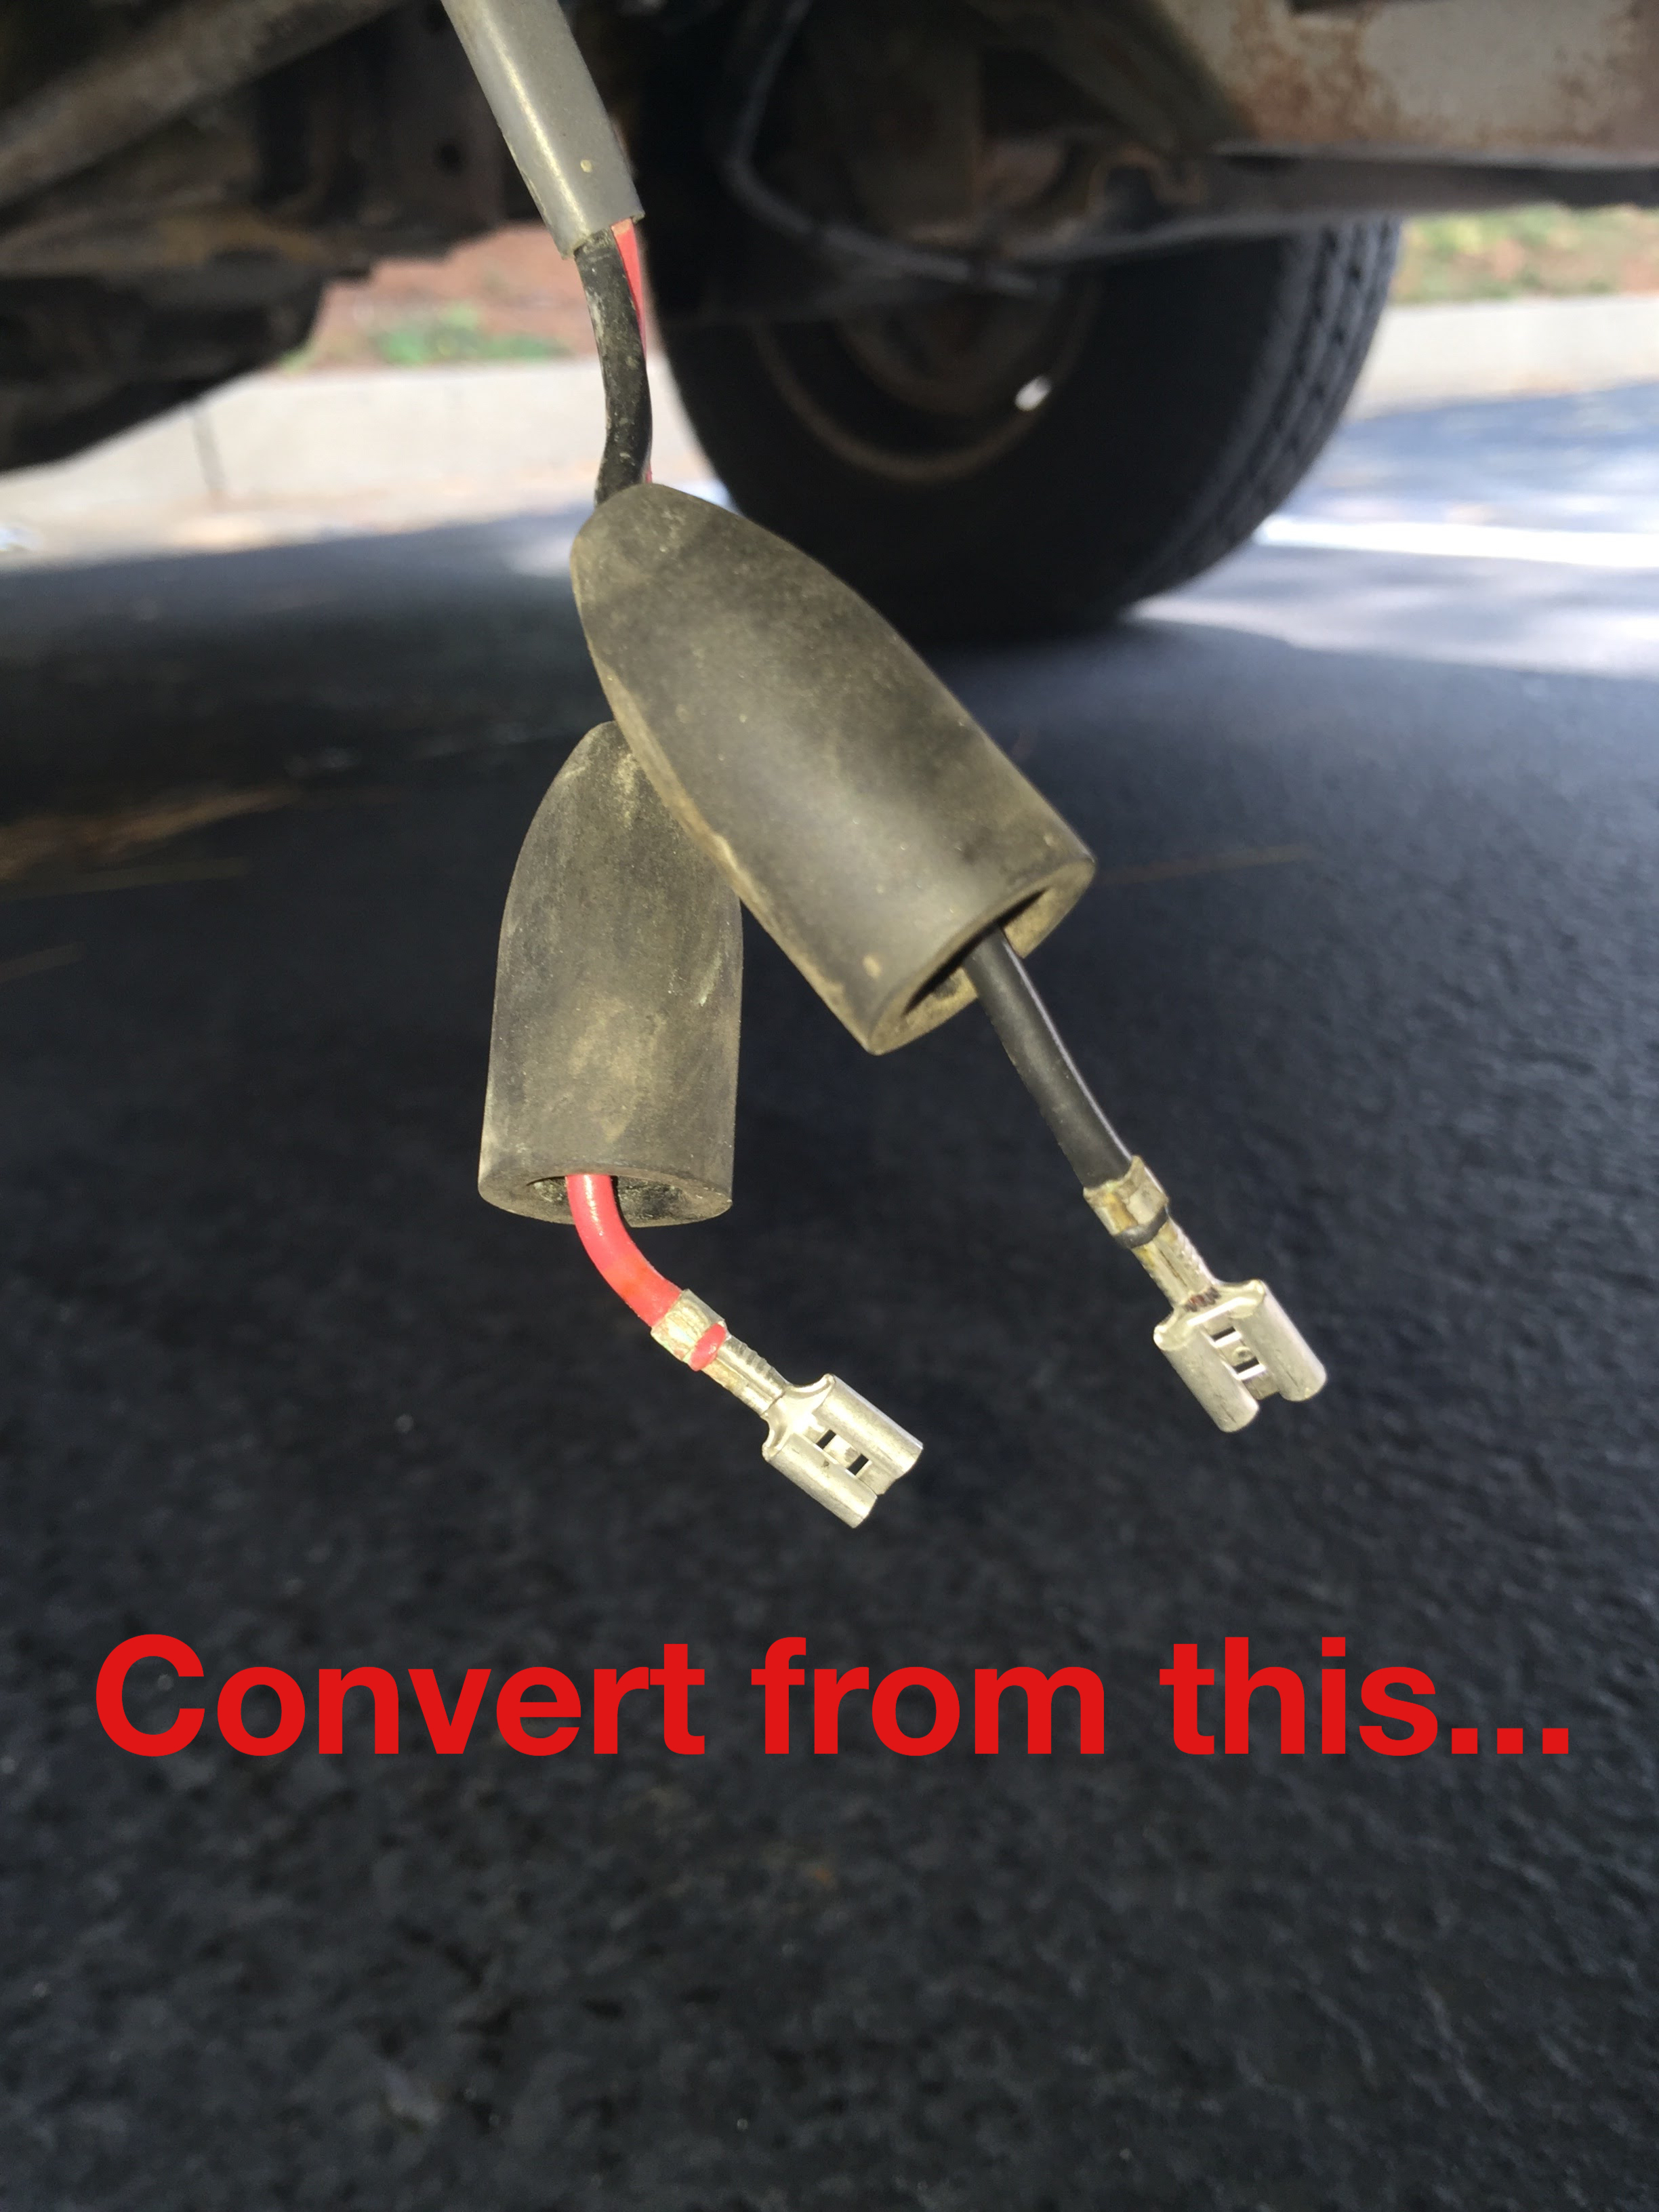
The only thing that makes this repair moderately hard is that the new pump comes with new, more secure eyelet connectors versus the original push-on spade connectors. You cut off the original connectors and crimp on the new ones. You will need basic wiring skills and tools to accomplish this.
As mentioned in the opening paragraphs above, a common reason your fuel pump fails actually has to do with your gas tank. For long-term reliability this must be sorted out. Bosch (or vanagon.org) will NOT warranty any pump that contains debris and/or has been damaged by a dirty fuel supply! These pumps work exceedingly well, but you must provide clean fuel.
Step 1:
Disconnect your battery!

Step 2:
Clamp shut the hose leading from the fuel tank! If you don't fuel will gush everywhere! To make sure you don't damage the fuel hose, some padding will be needed. A pair of vice grips and a folded paper towel works great.

Step 3:
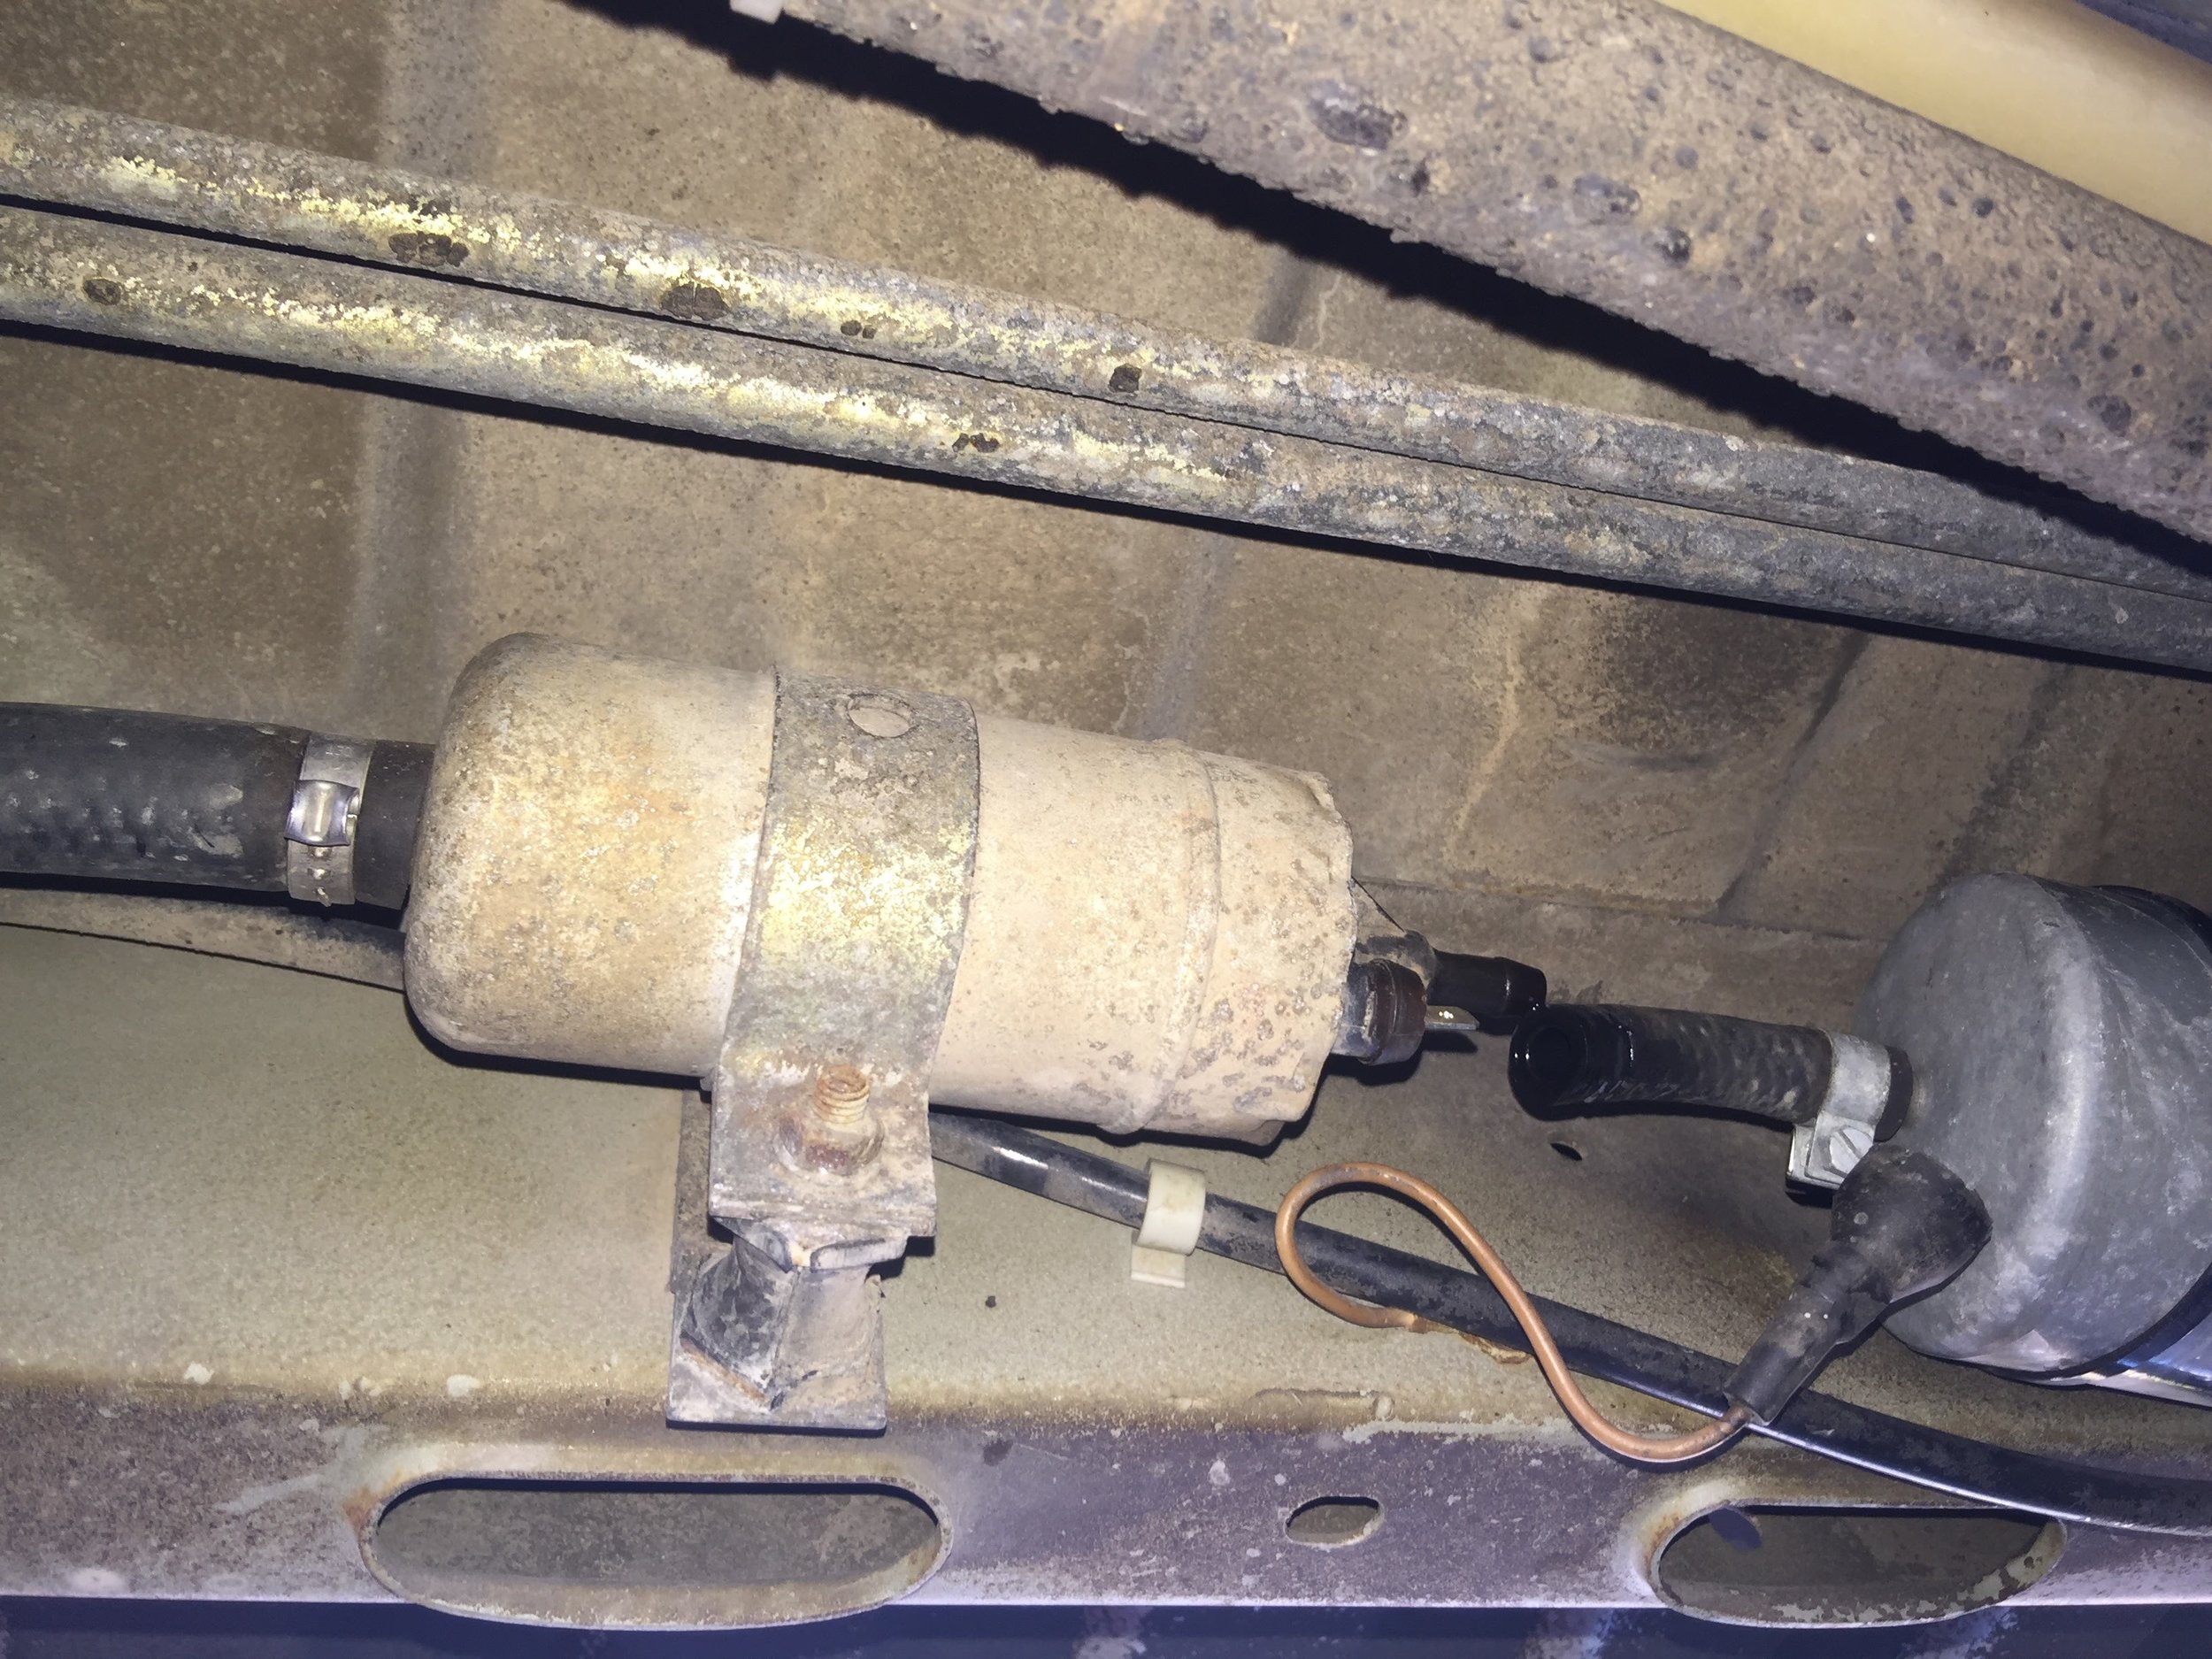
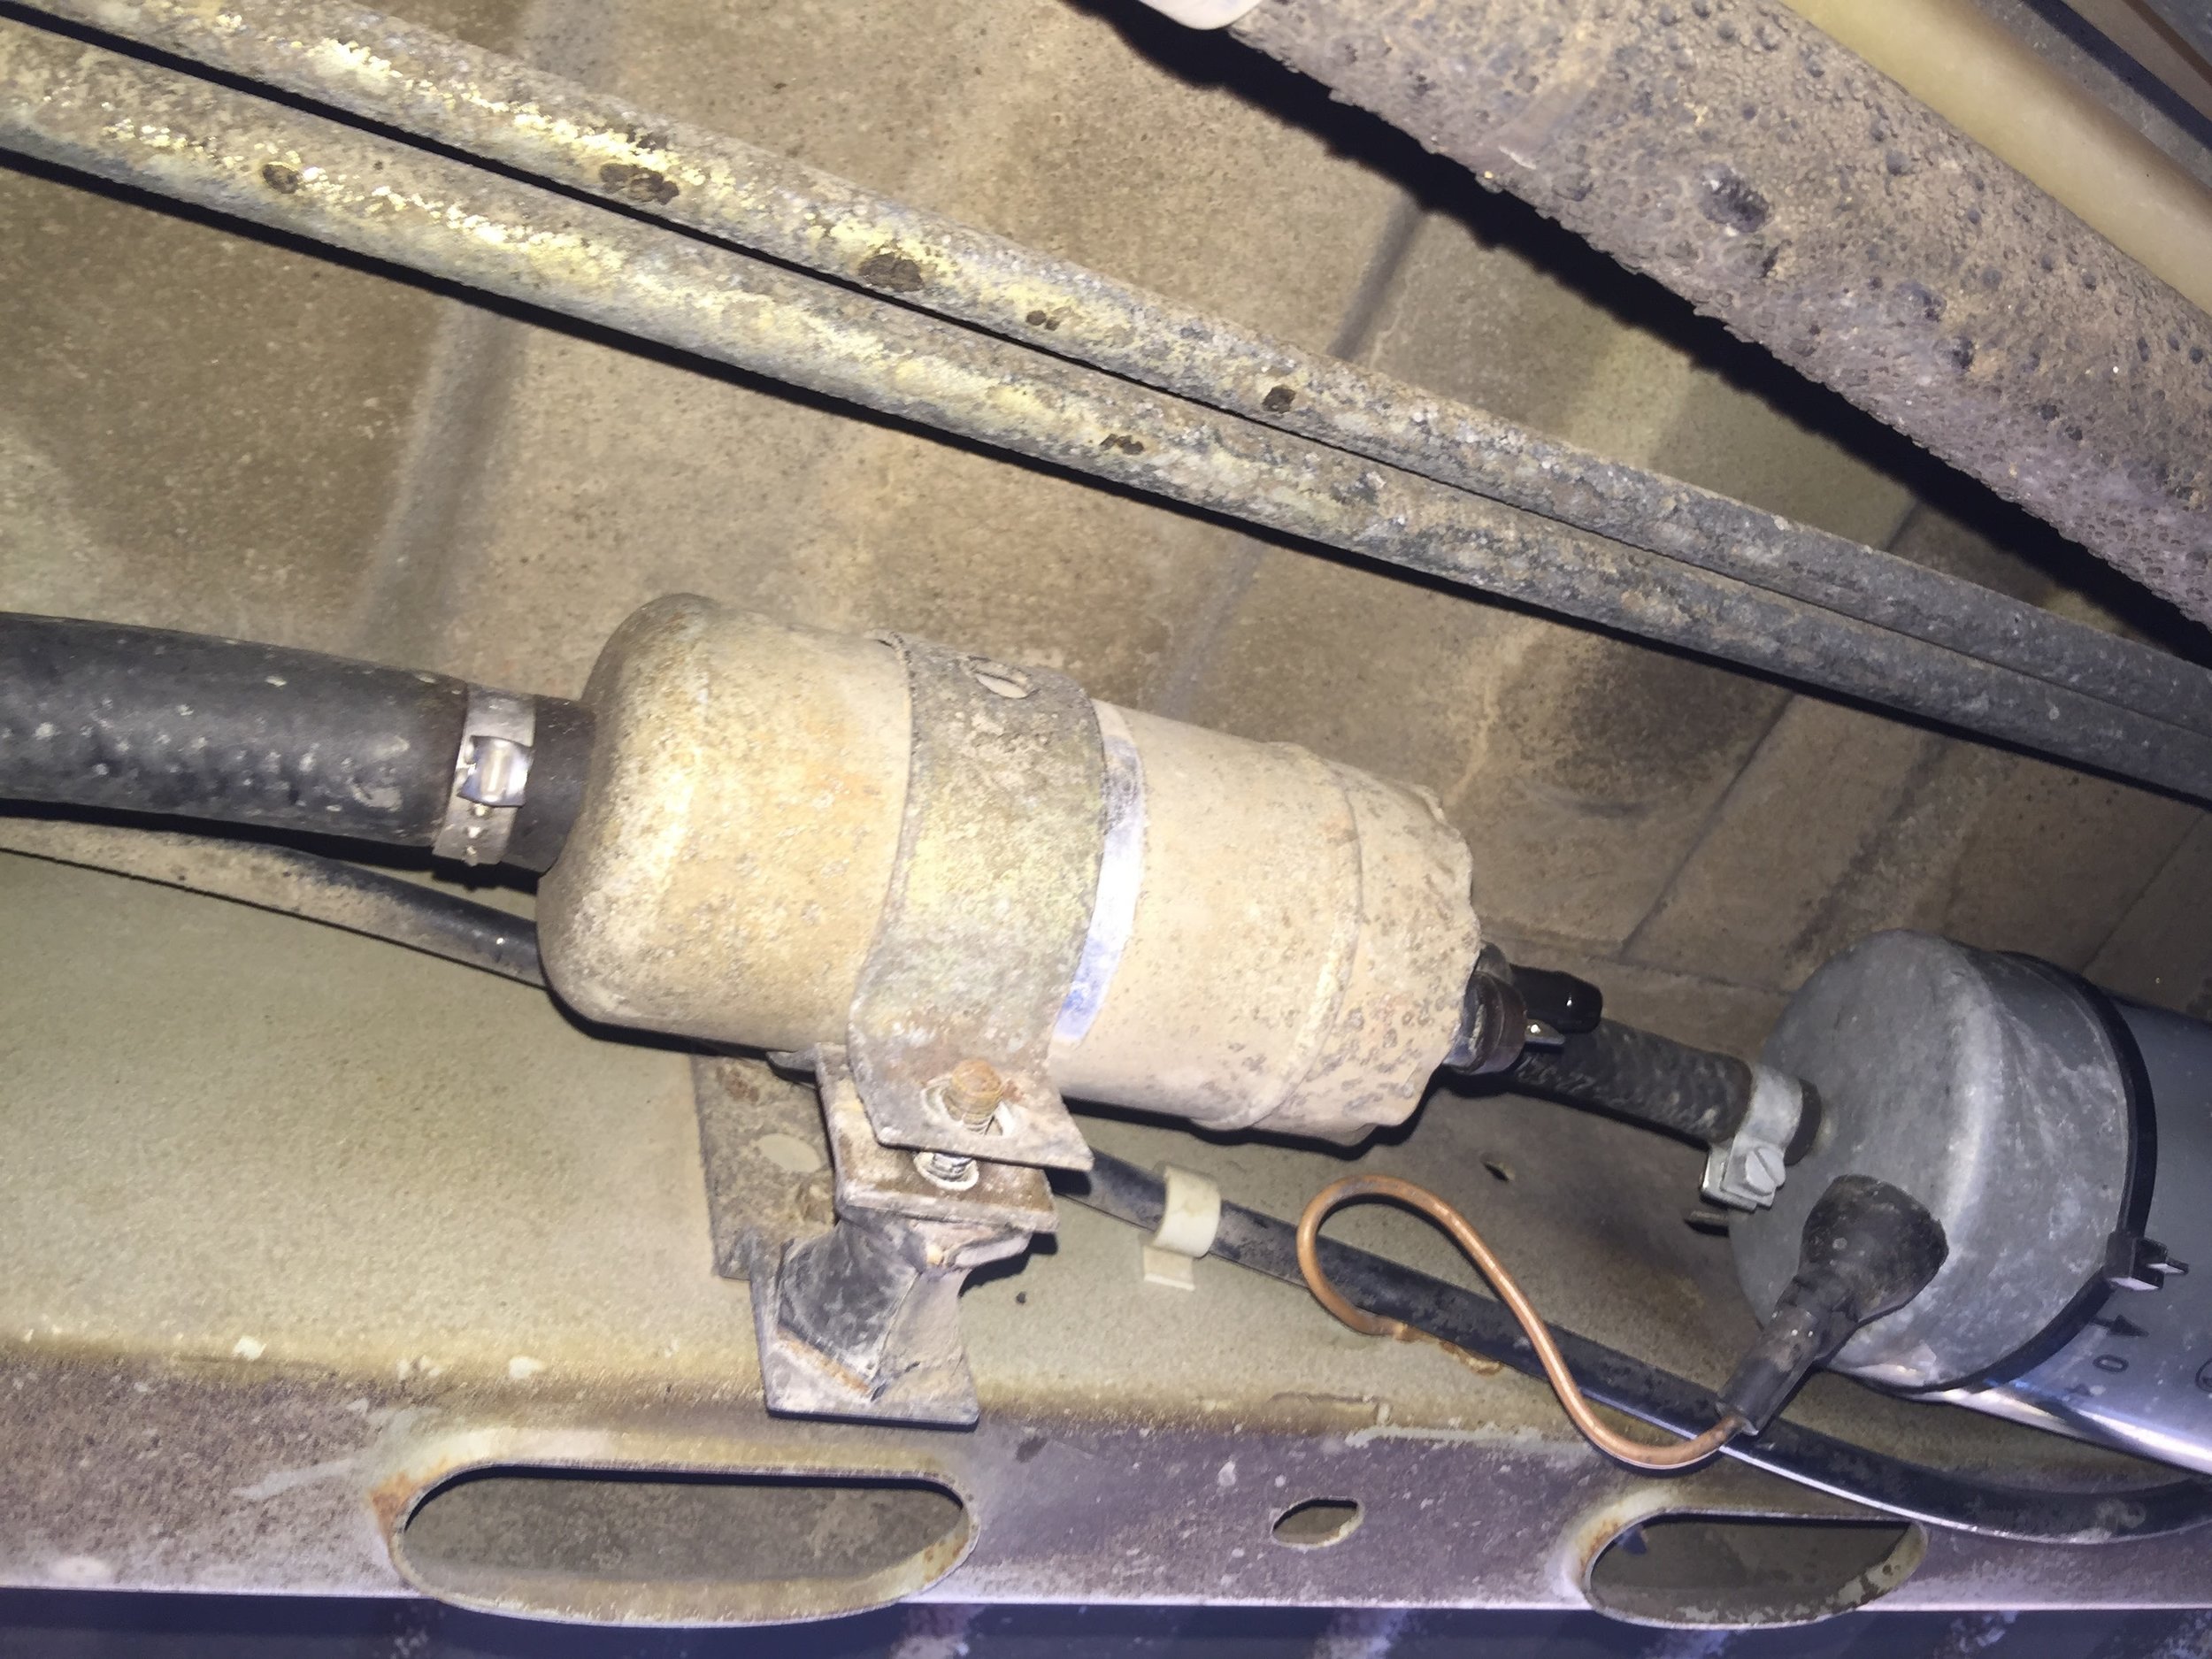
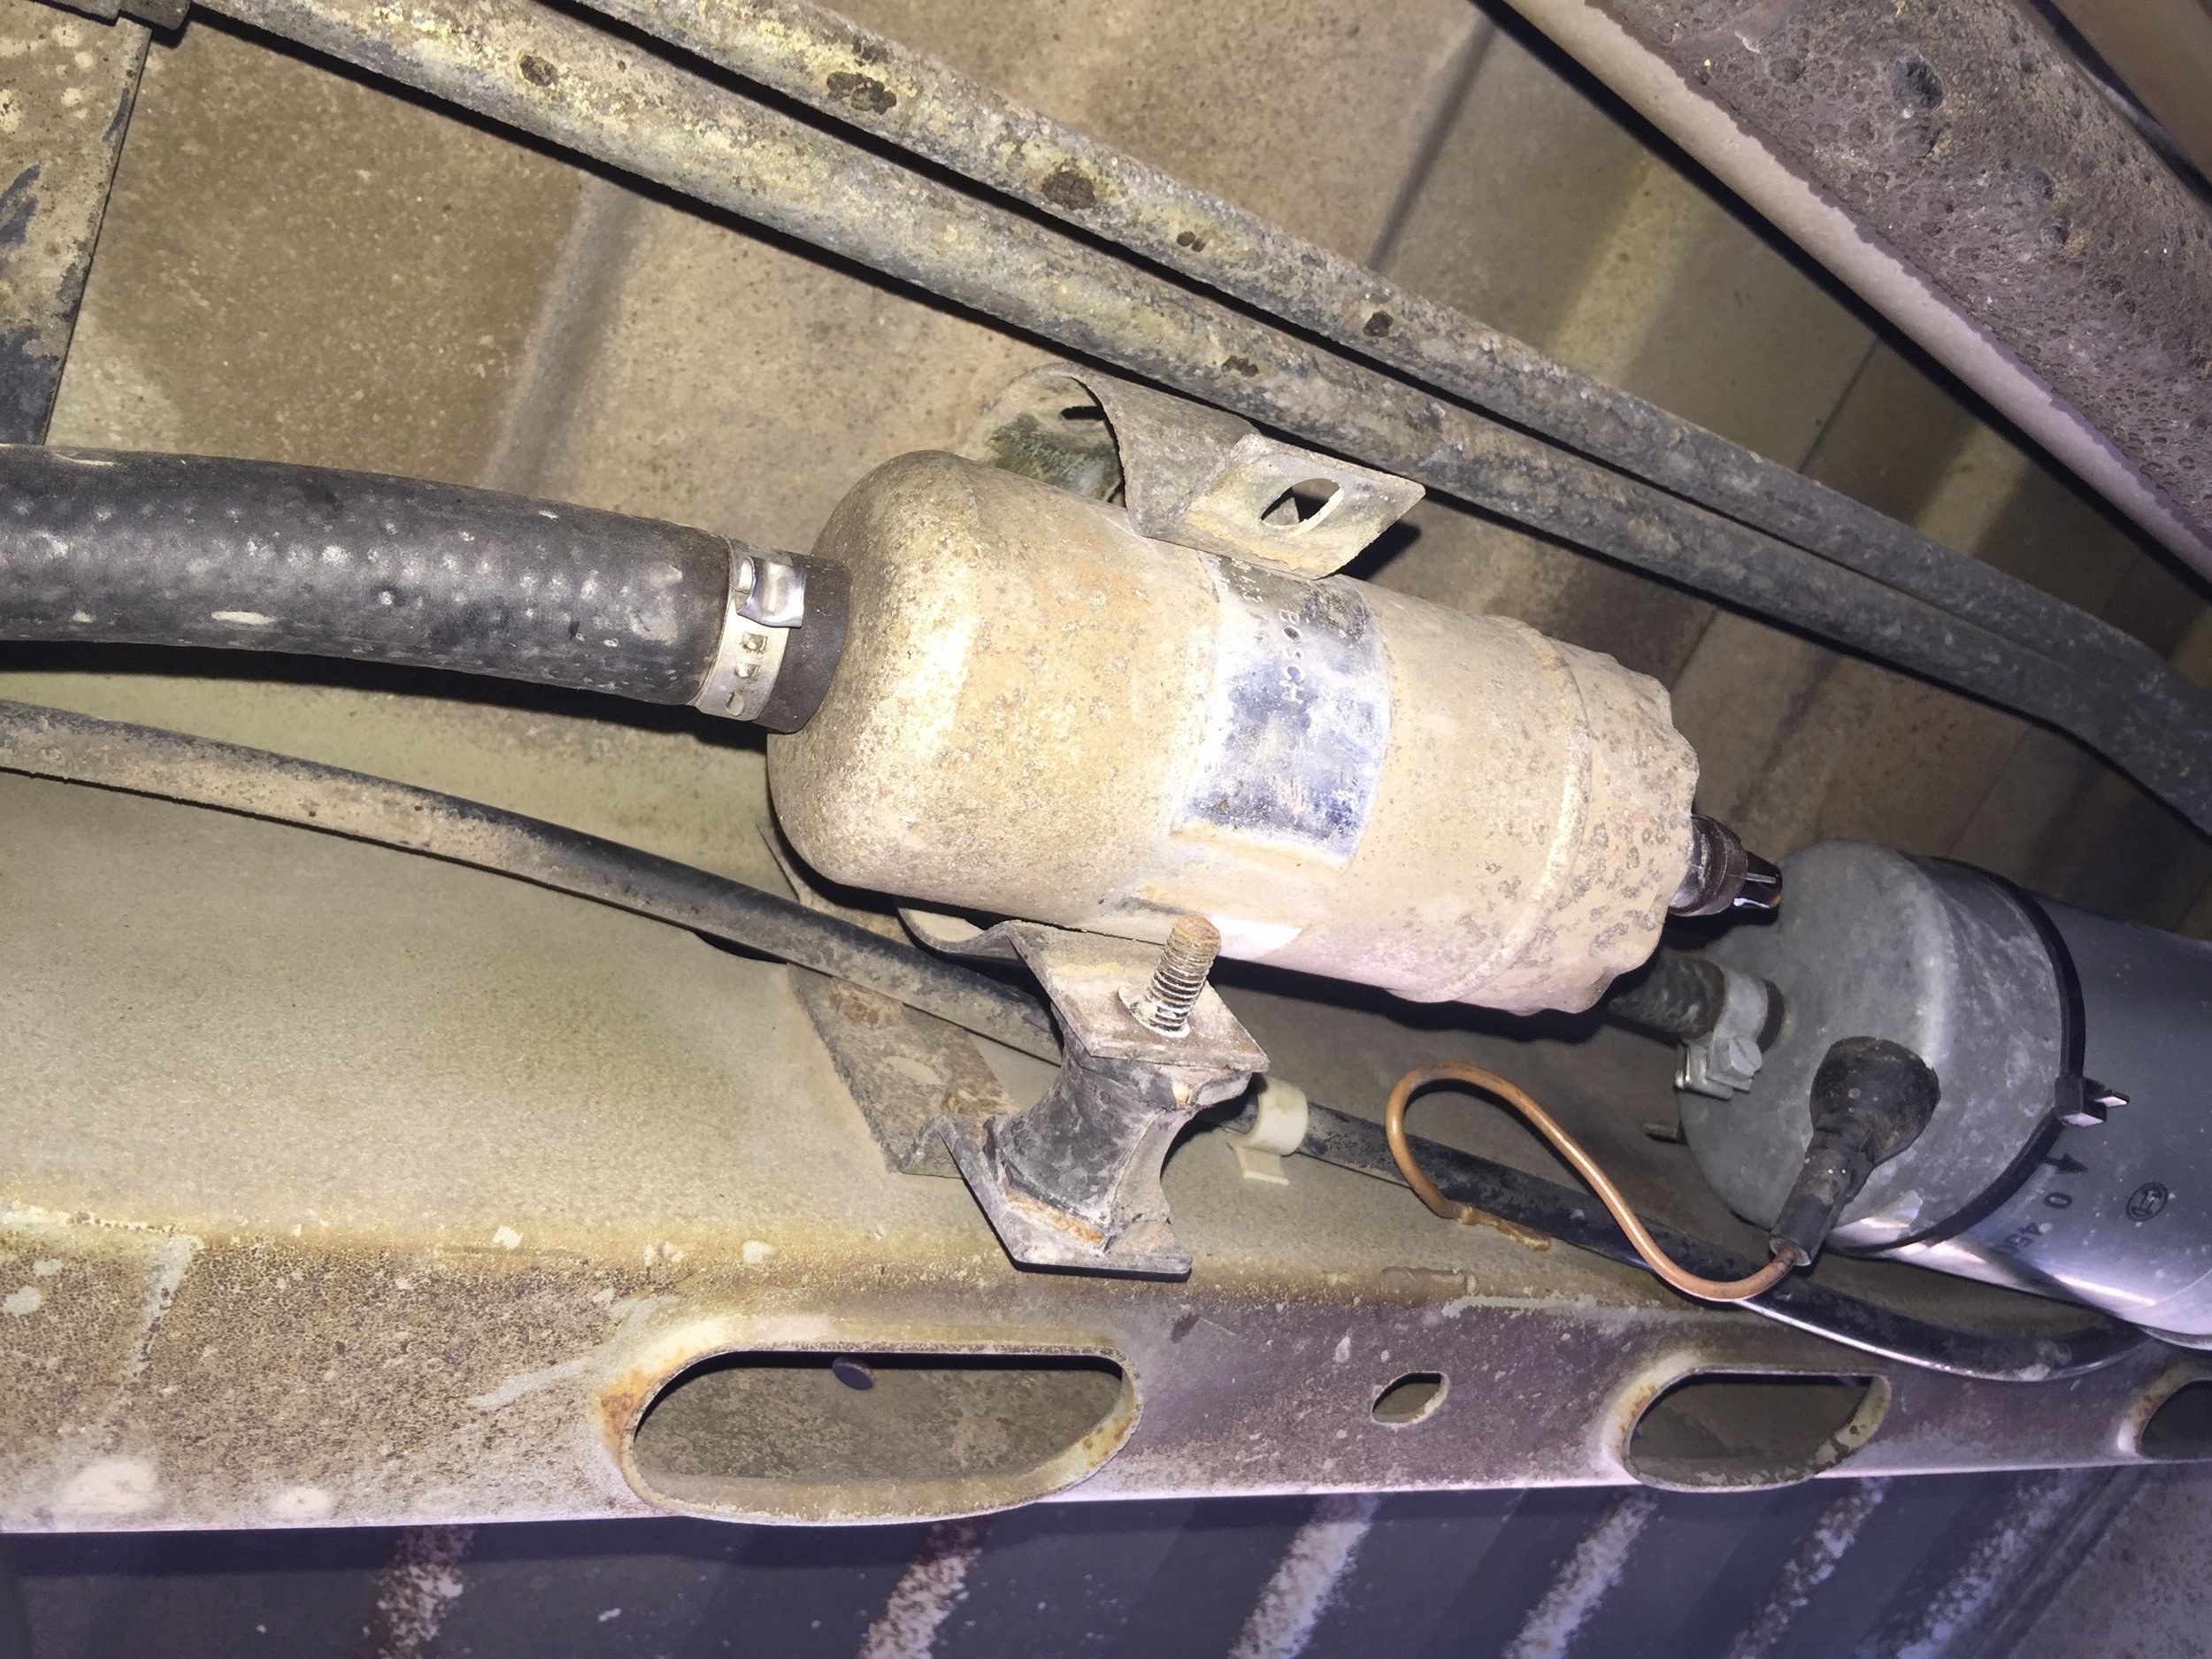
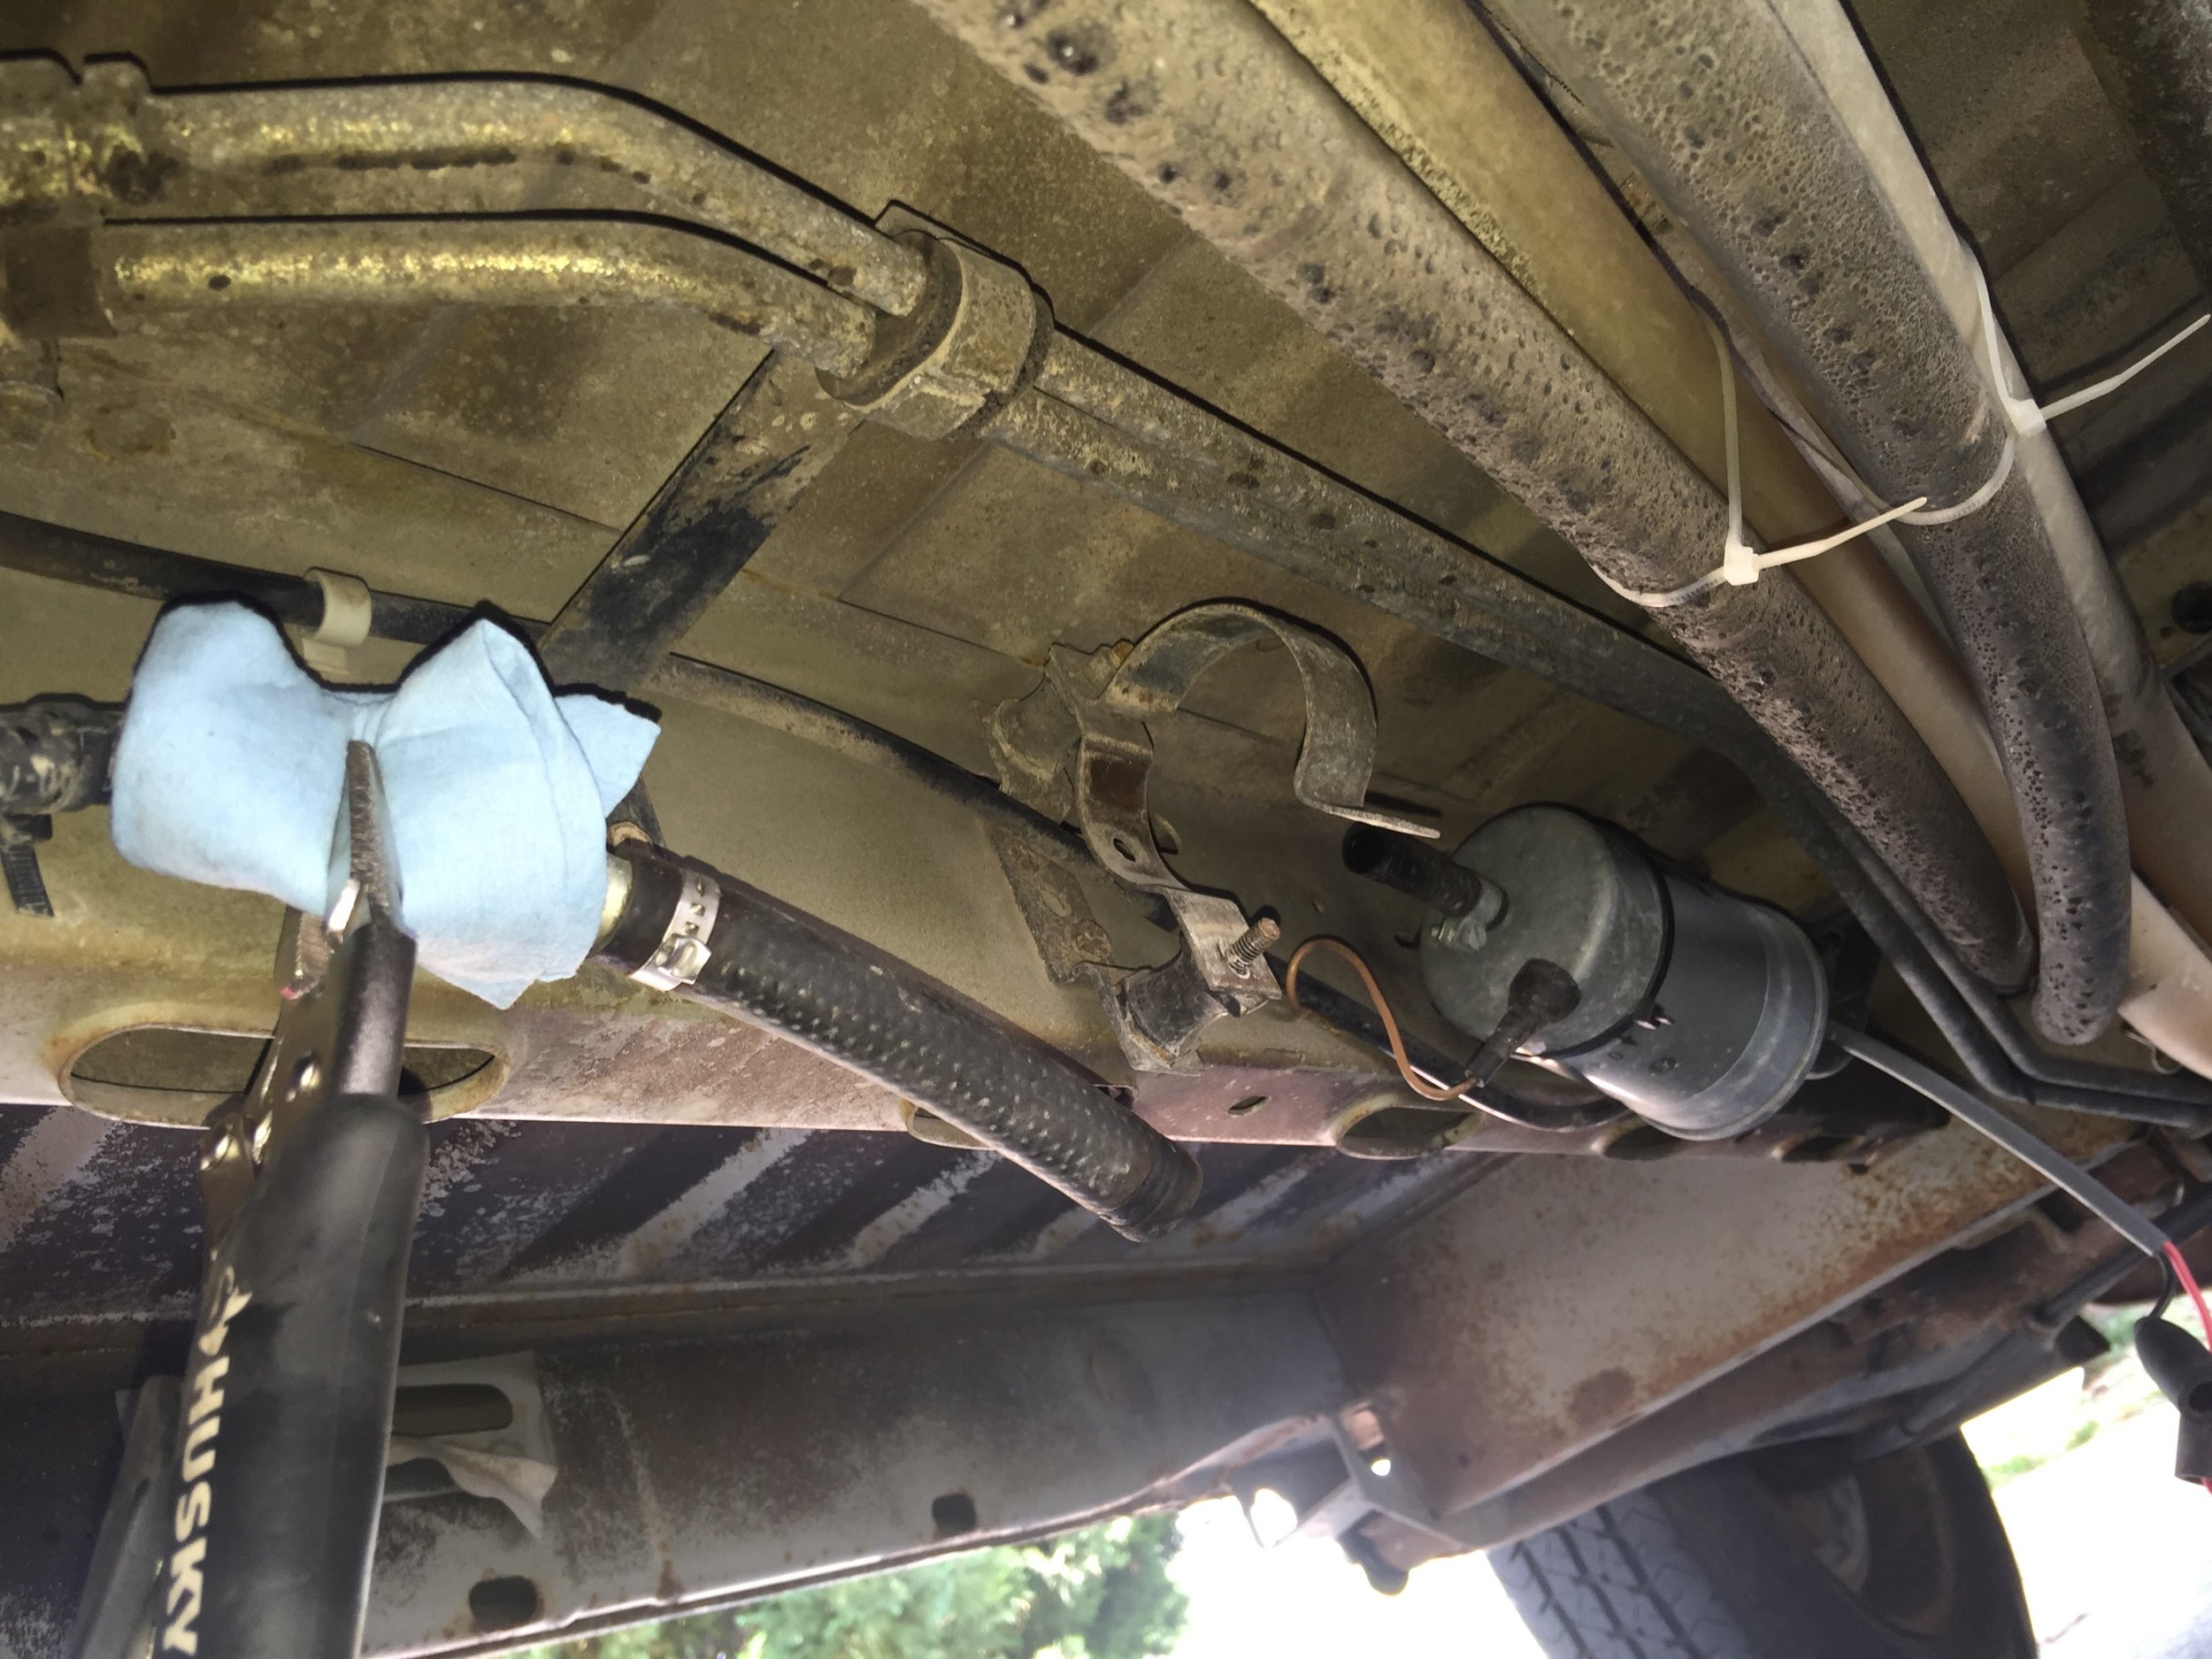
Remove the old pump.
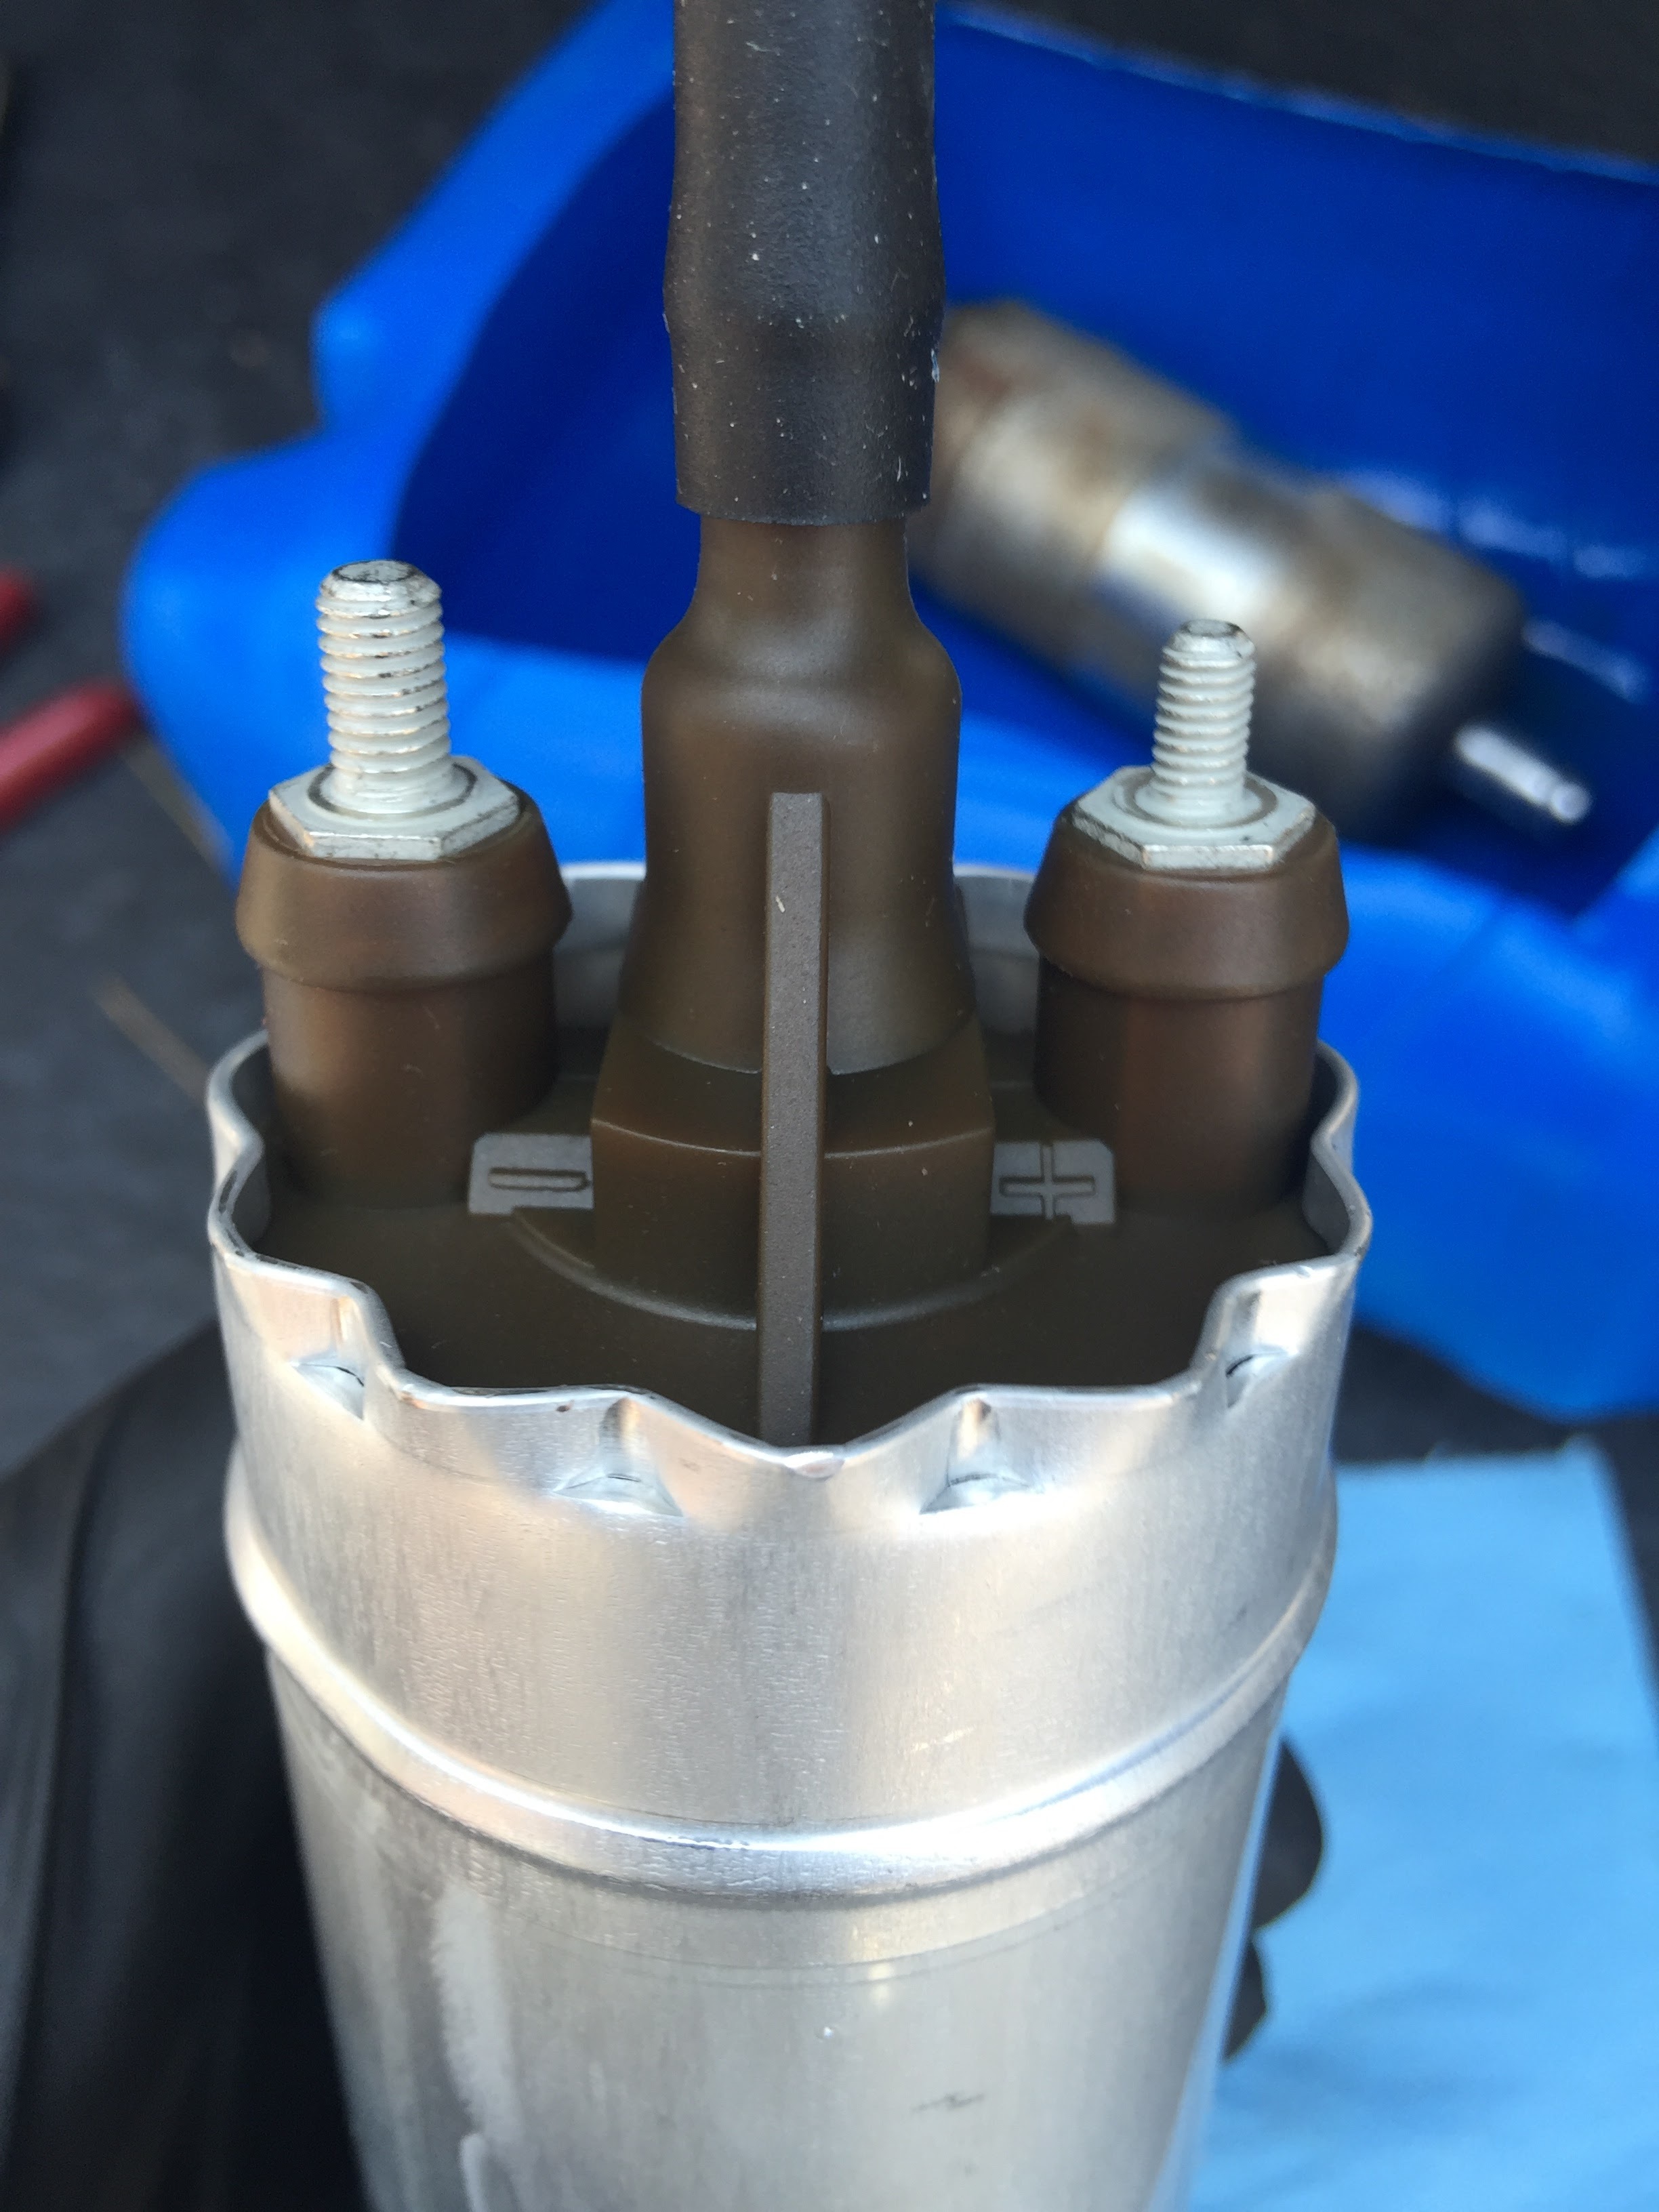
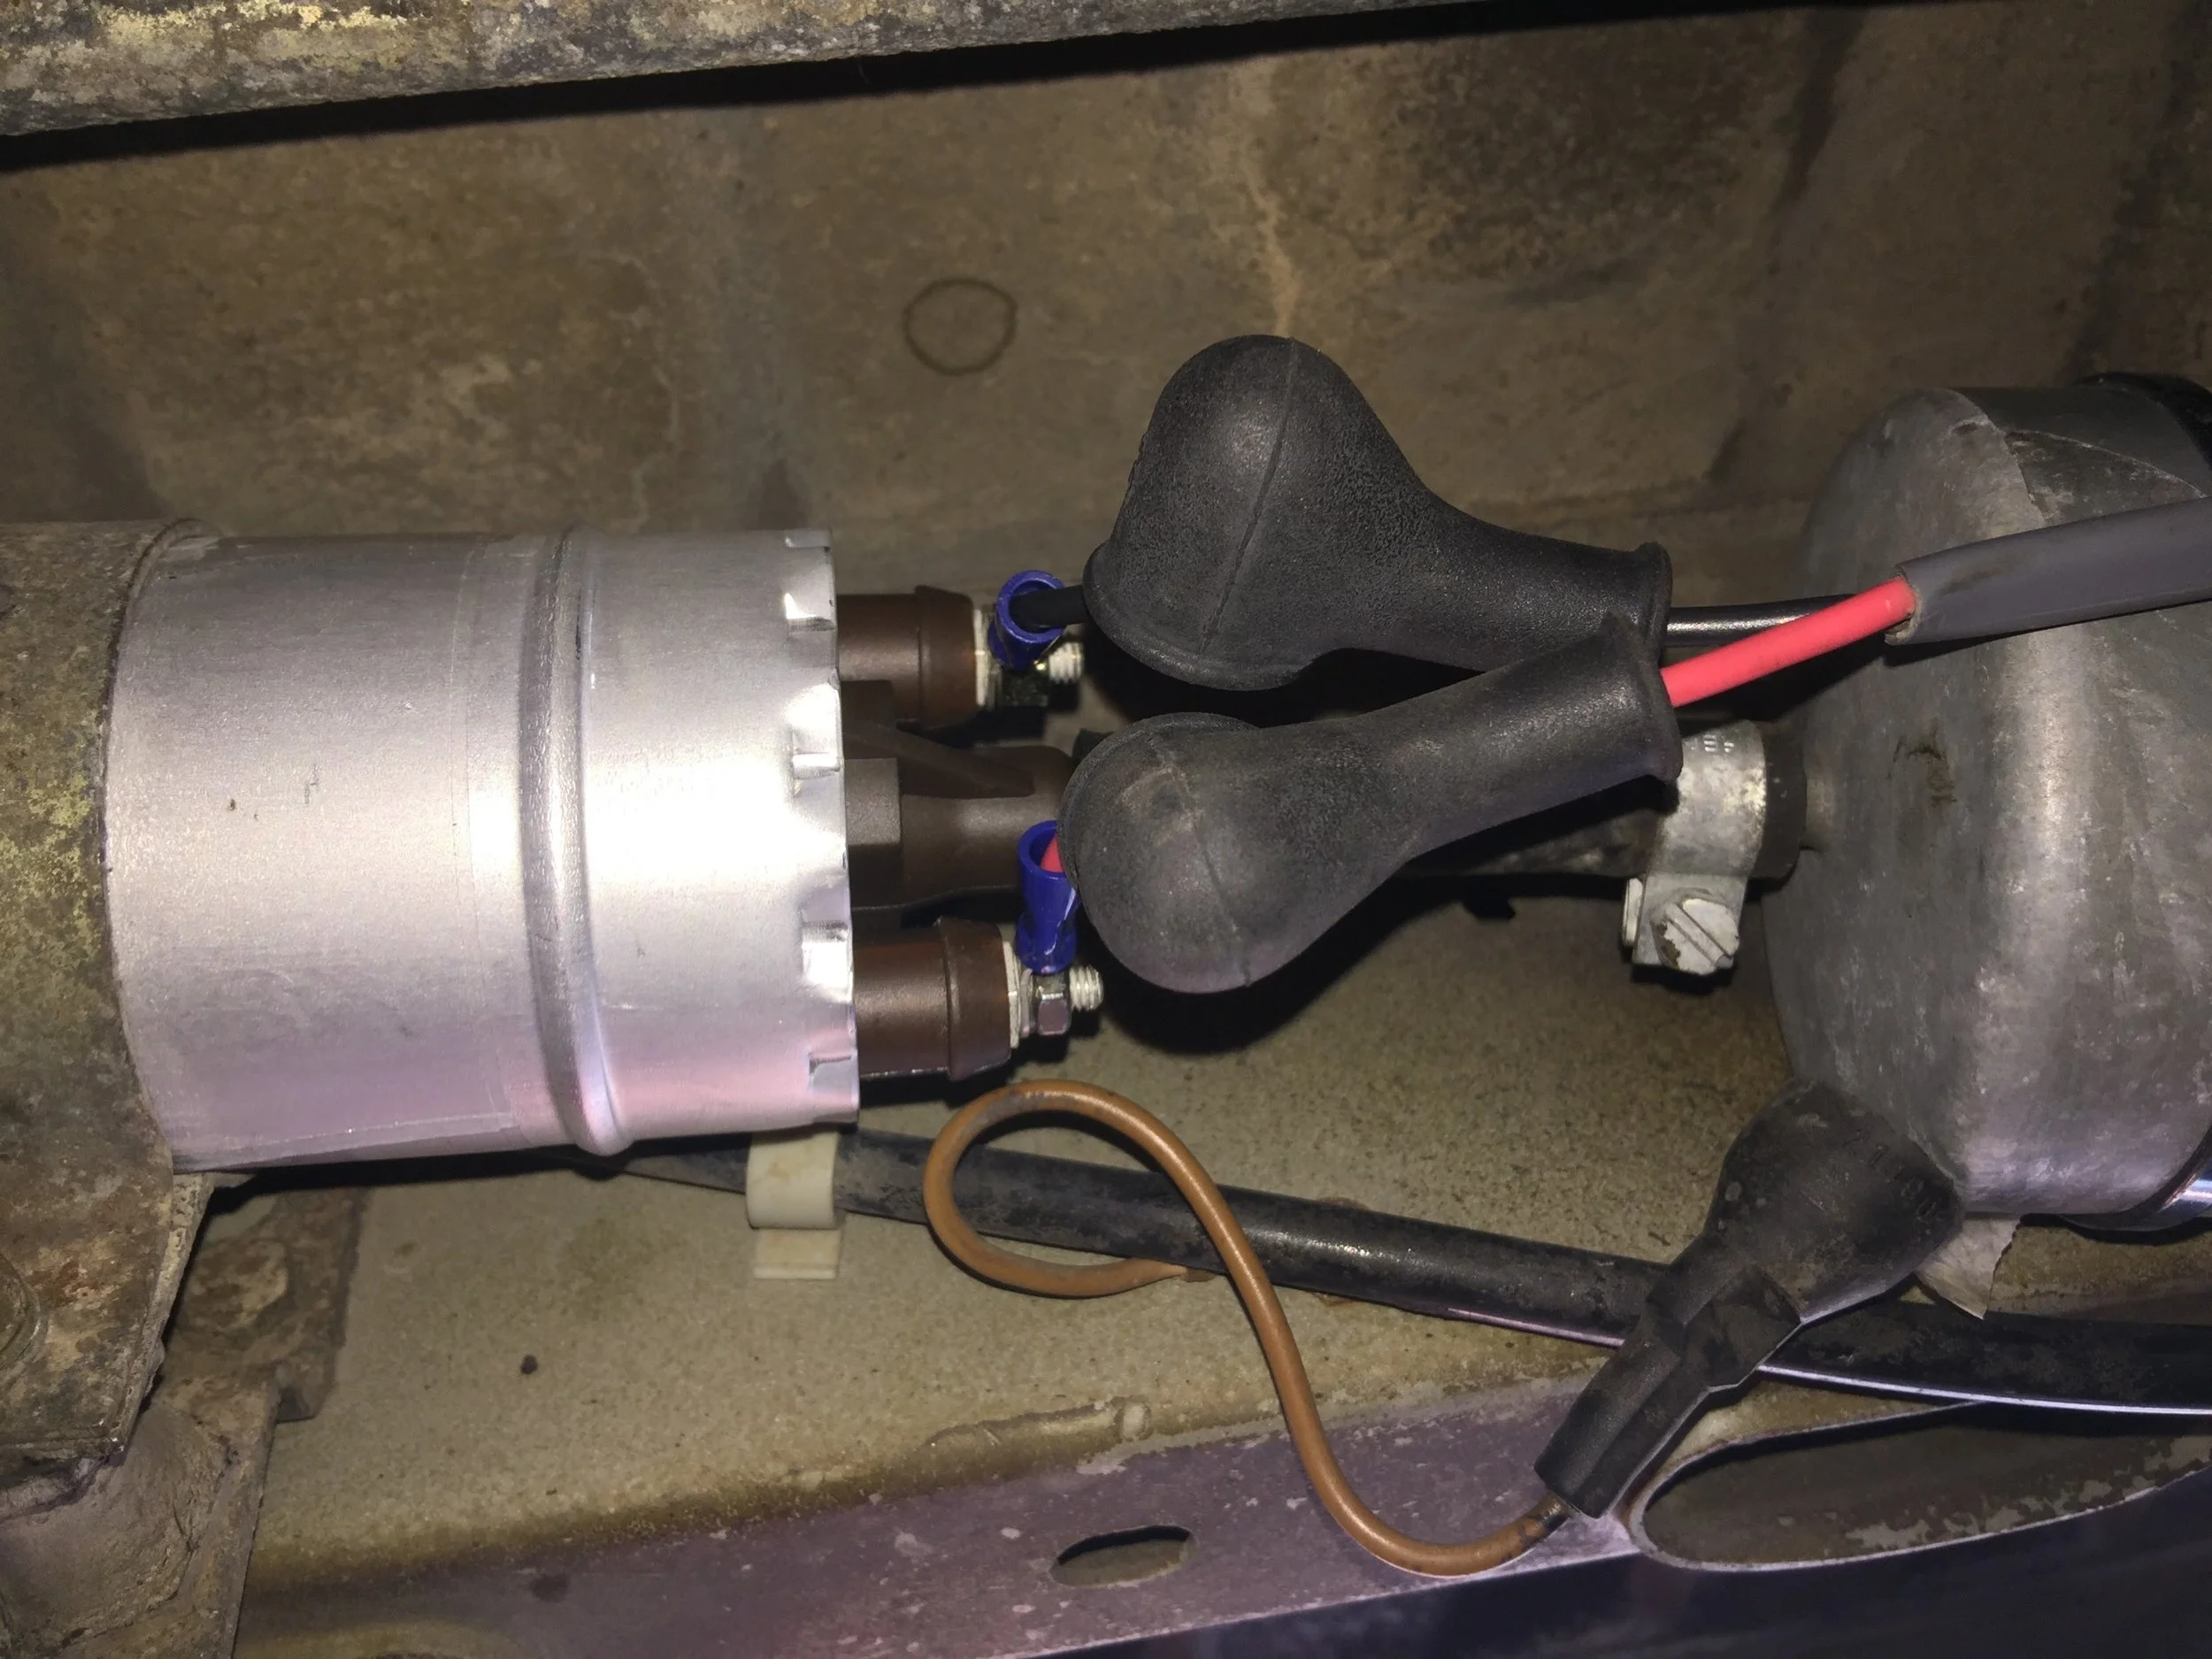
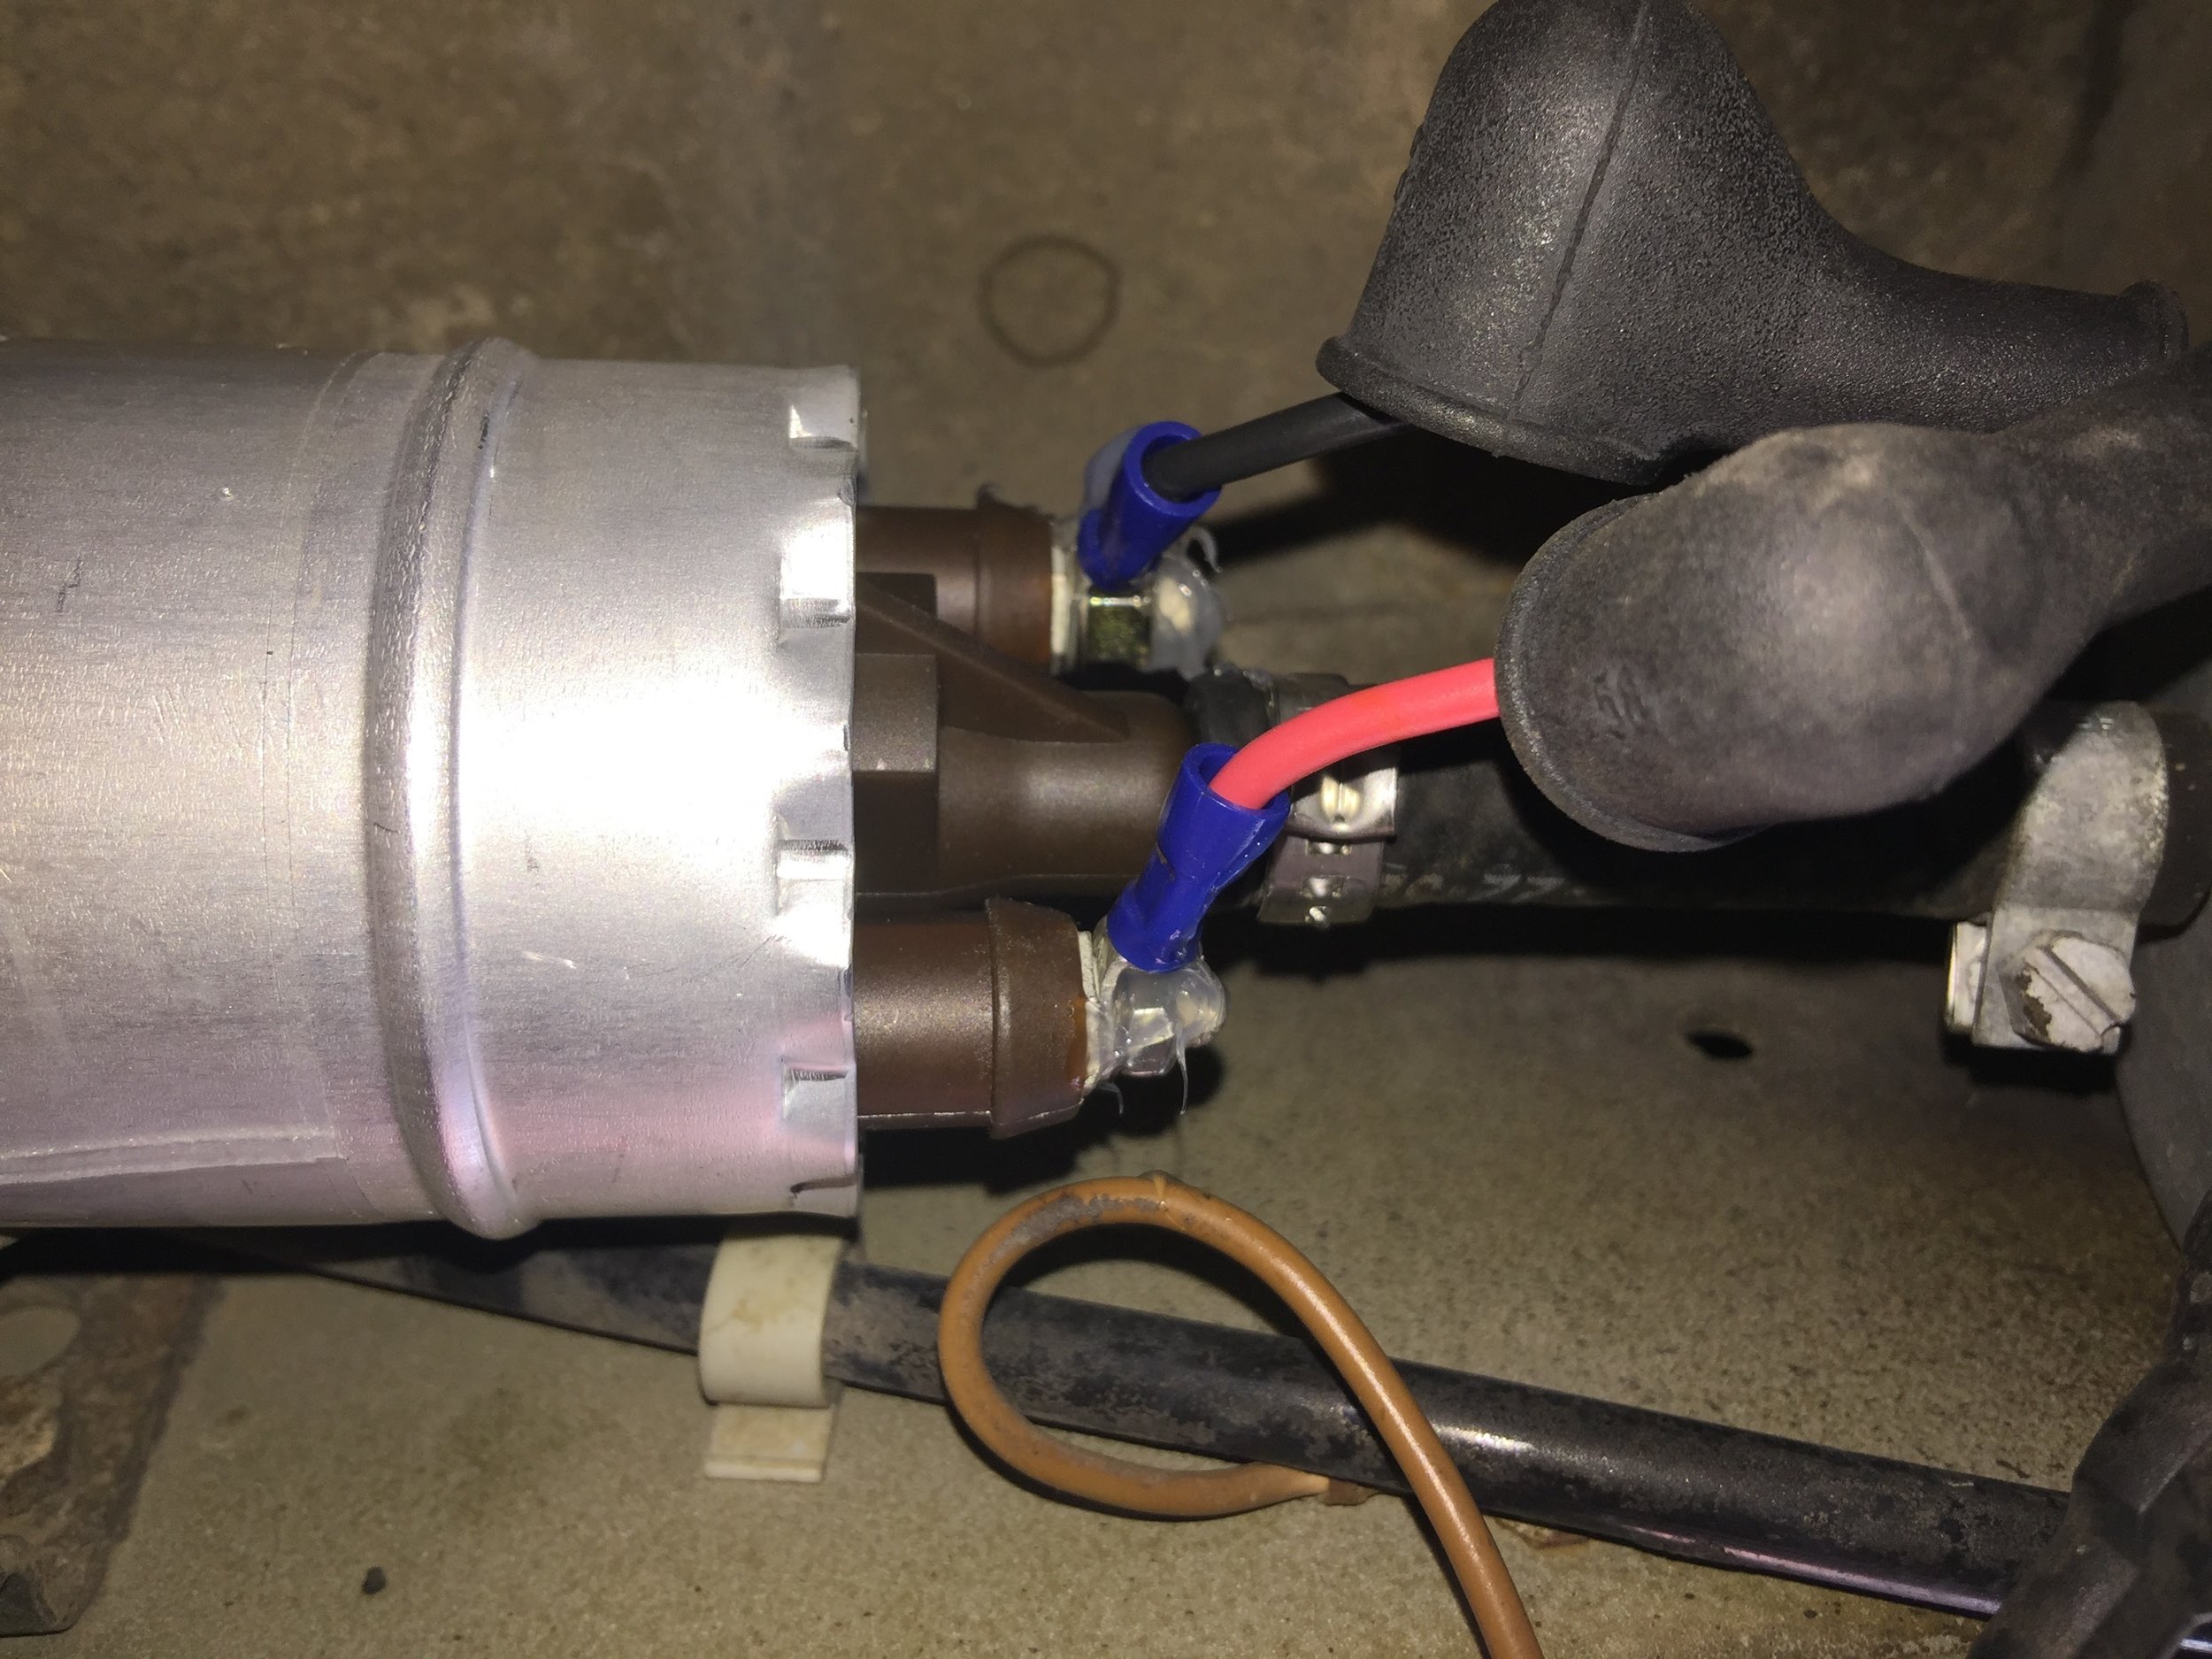
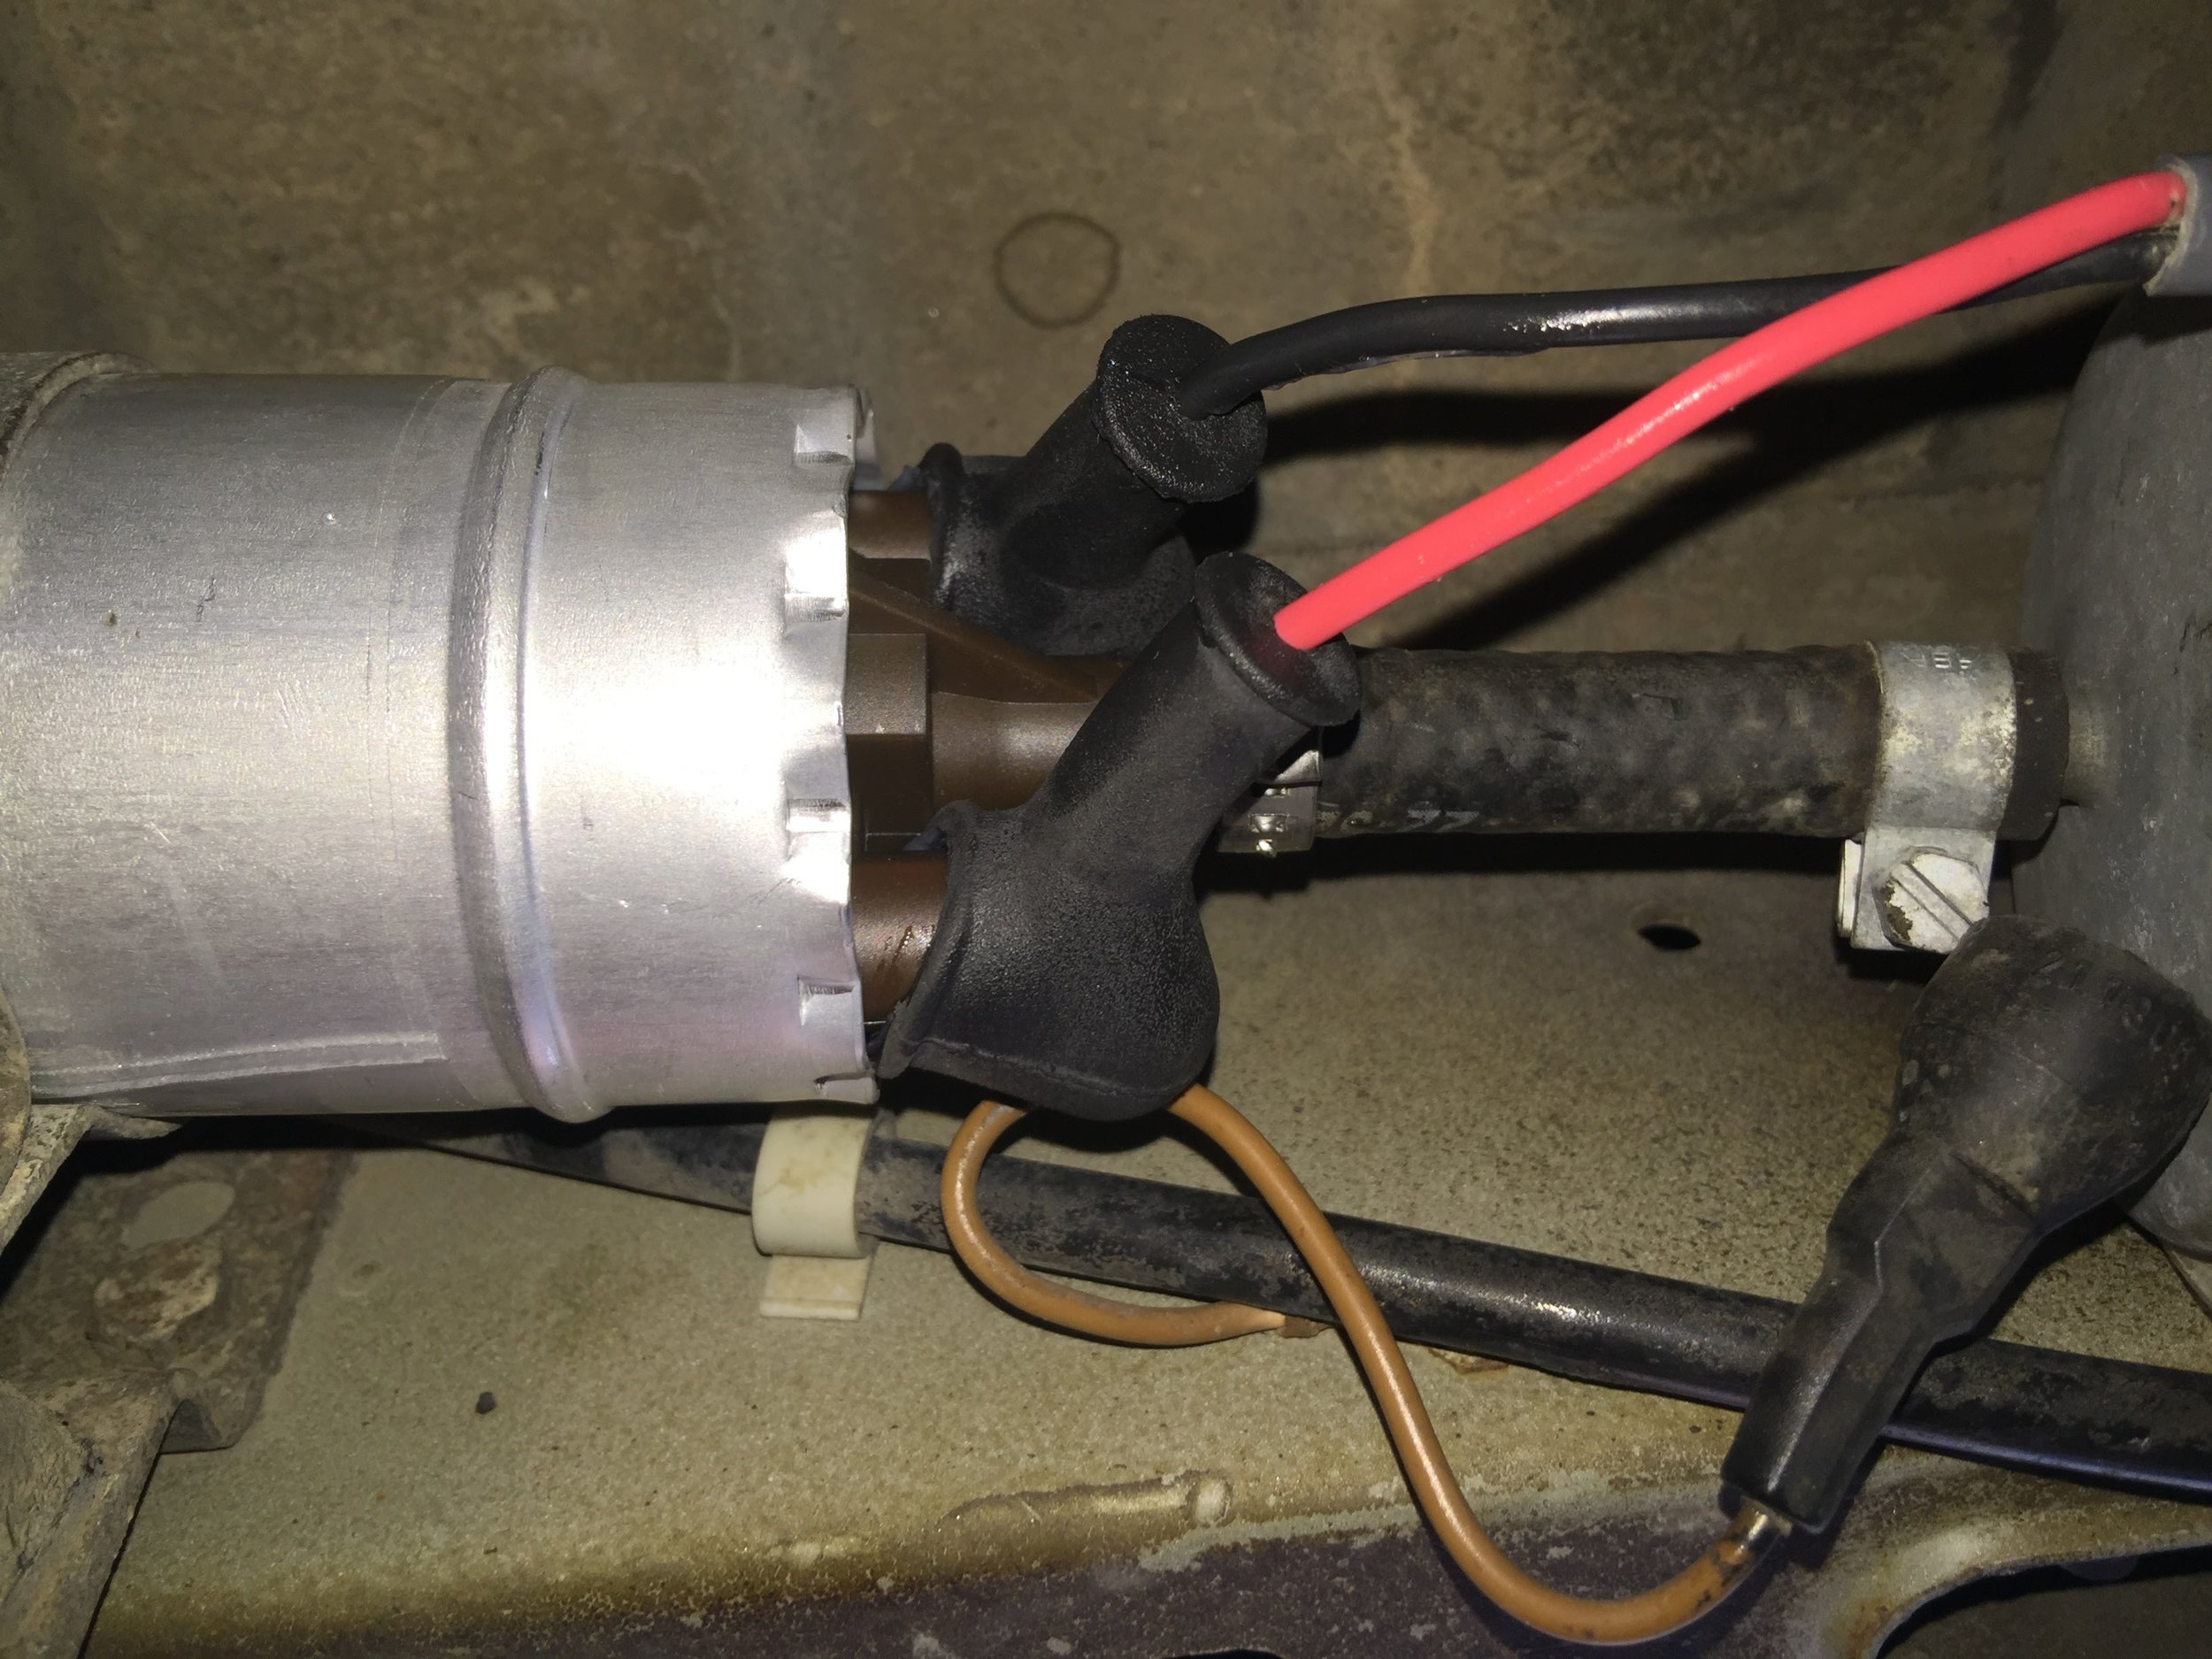
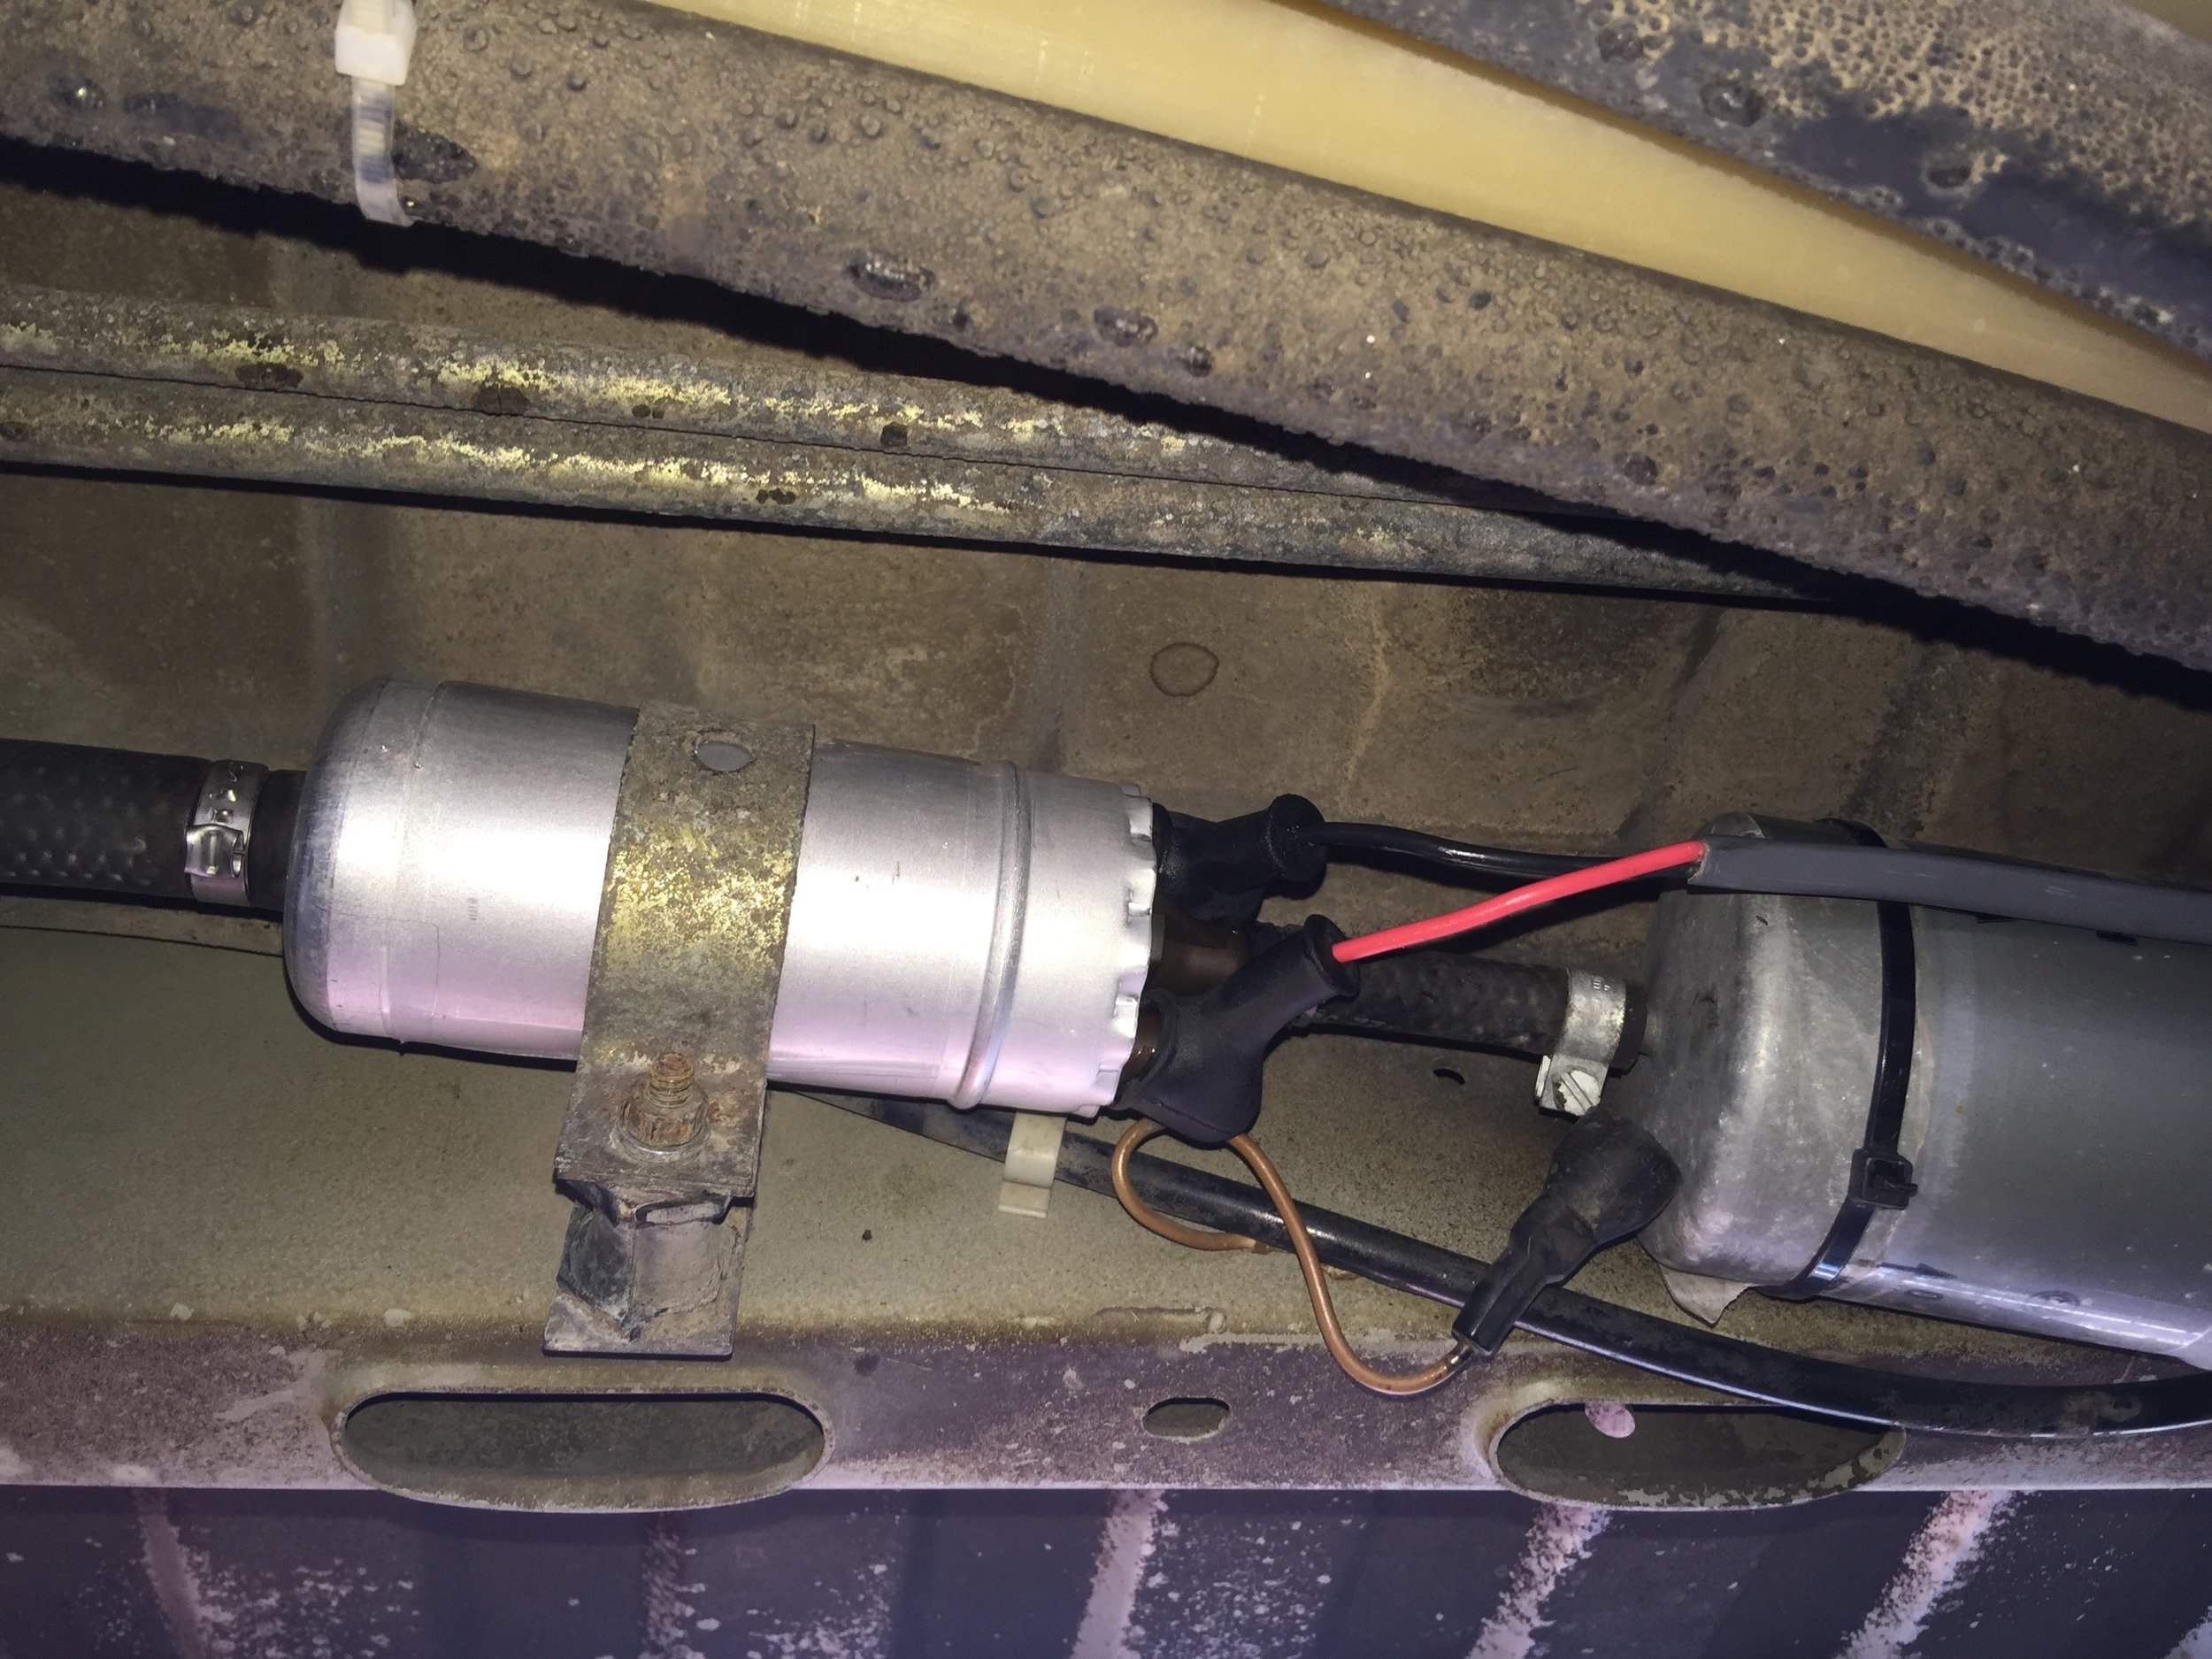
There's one nut for the bracket, two electrical connections, and two fuel hose connections. It doesn't really matter what order you do these in, so do what works for you.
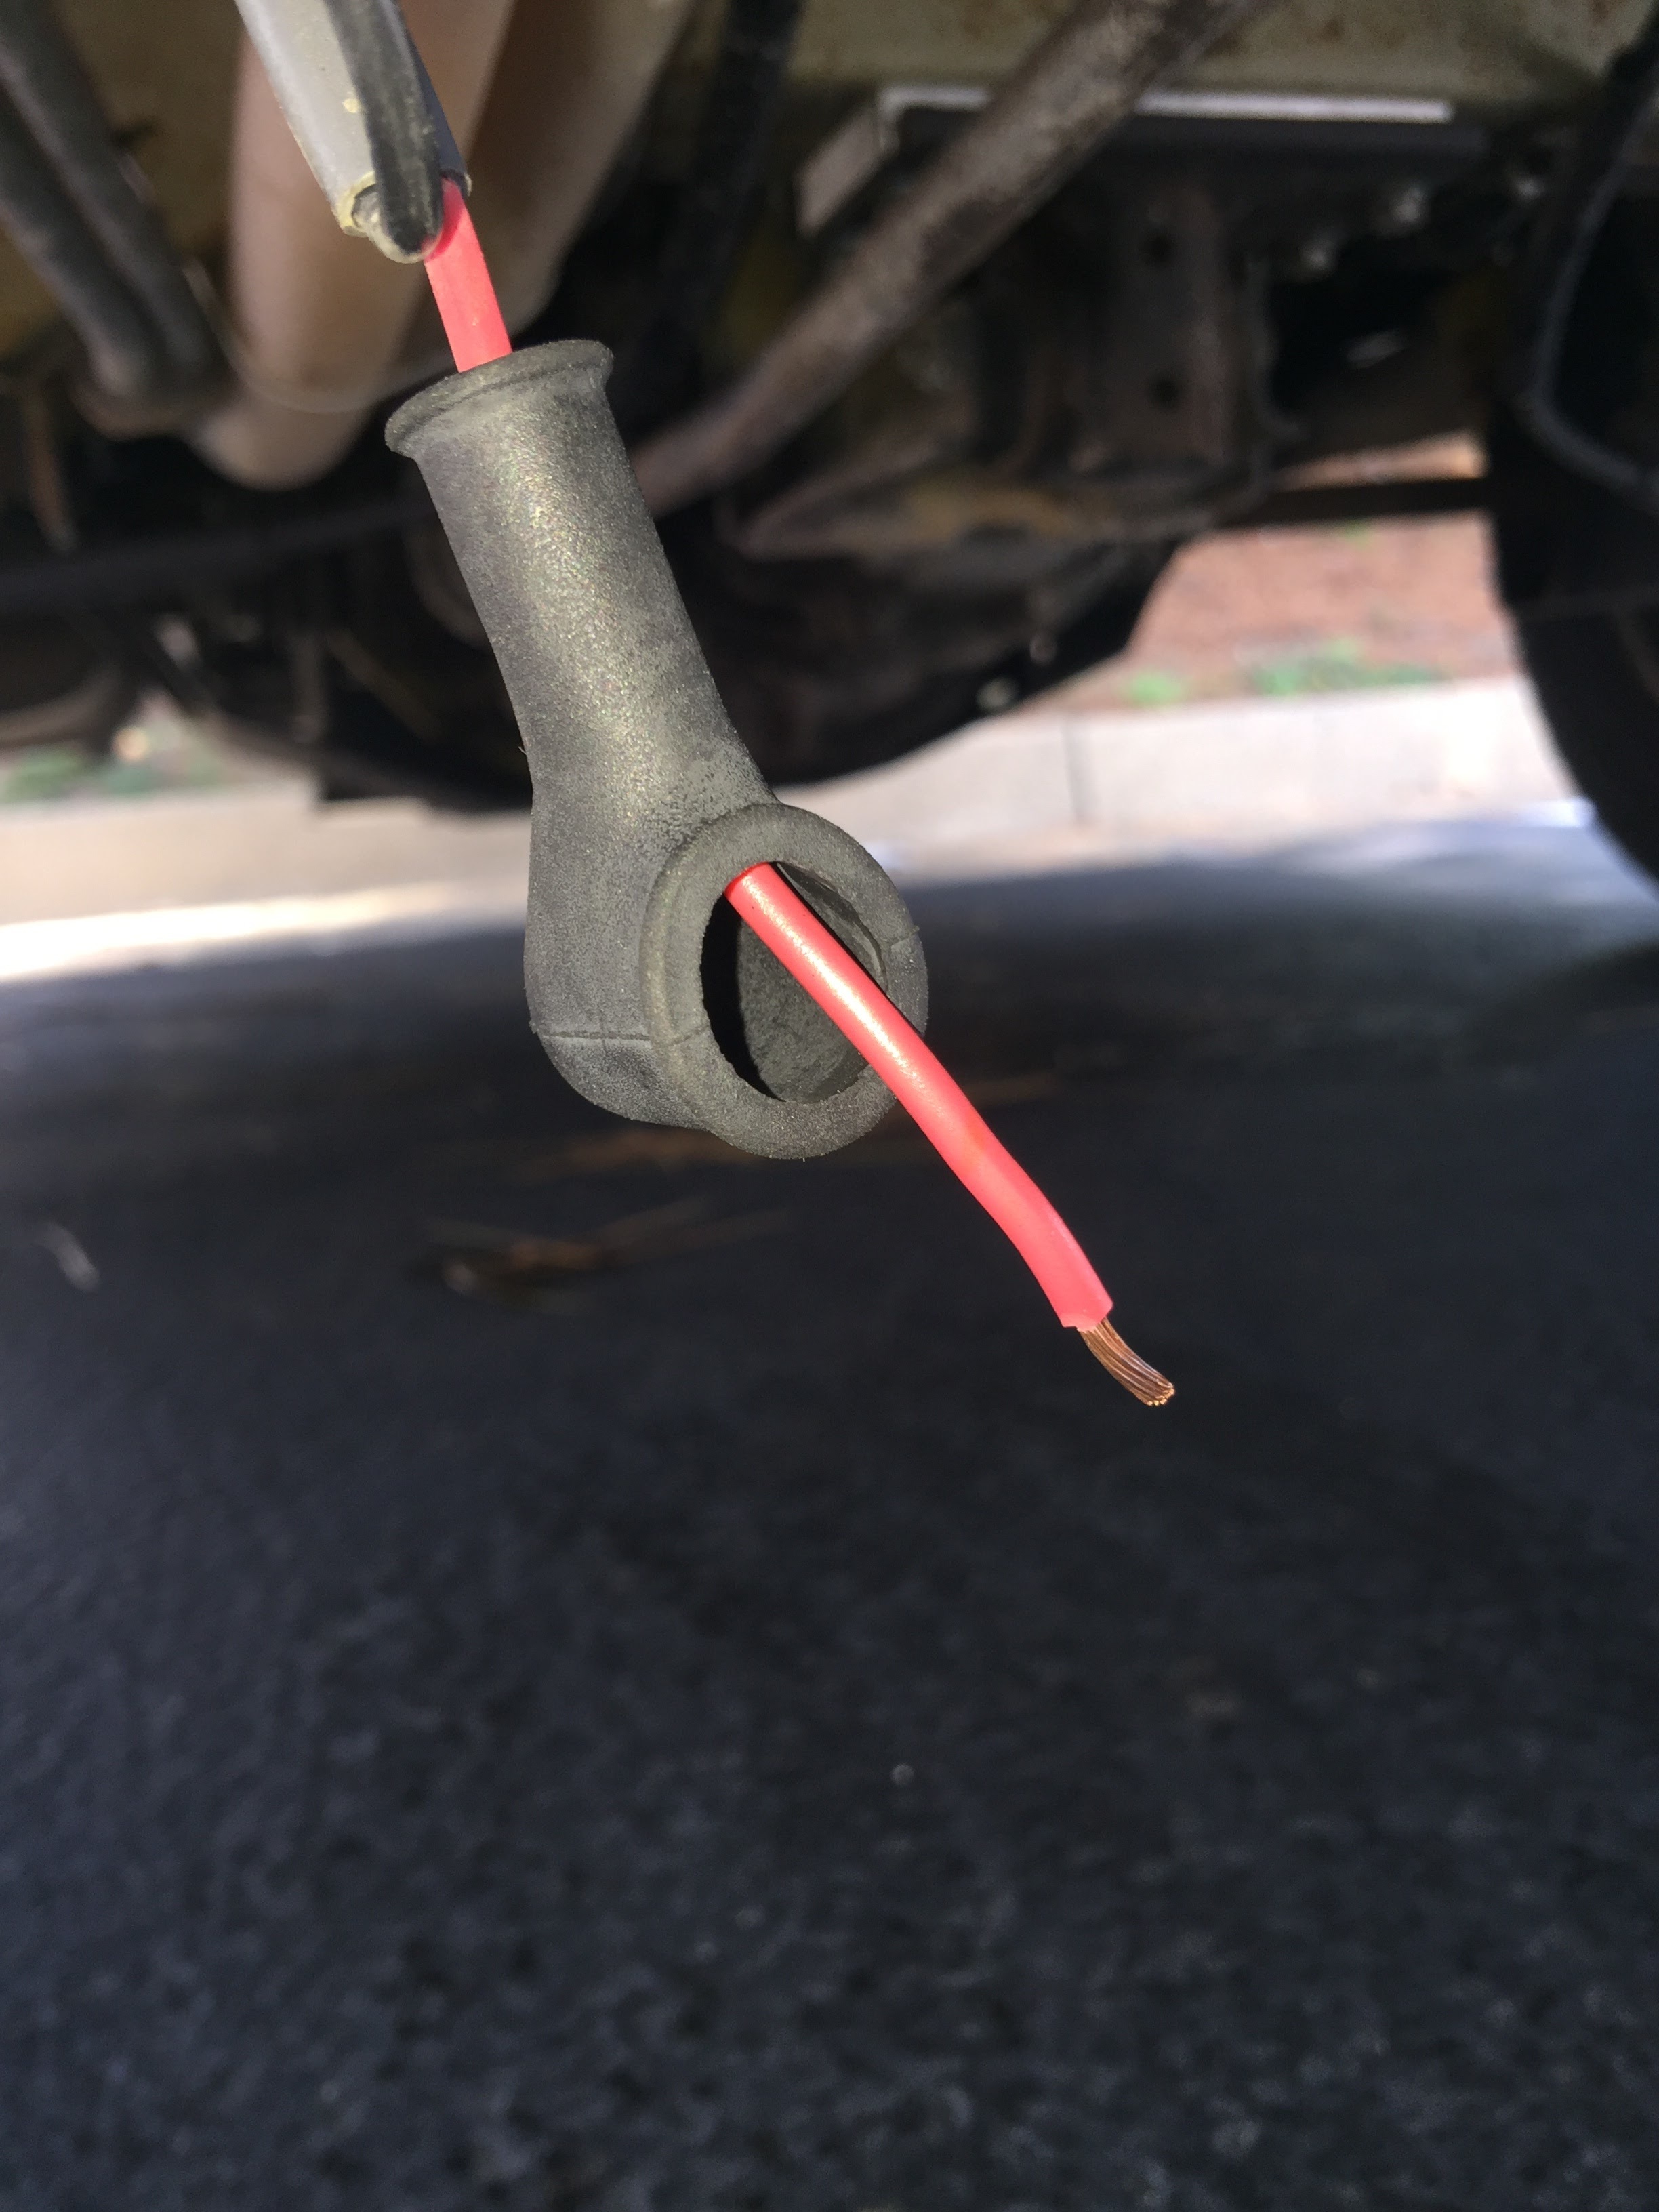
I usually start with the electrical plugs. The stock electrical connectors can simply be pulled off (or unscrew a nut, then remove if you have a modern replacement already).
There is one nut holding the bracket mount for the fuel pump closed. Remove the nut and then gently bend open the metal clamp.
For the fuel hoses, either unscrew the clamps, or, if you use ear clamps, cut them off. Make sure your catch basin is in position before removing any fuel lines! If the clamps won't come off for some reason, you can simply cut the fuel hose itself. If you have to go this route it's not the end of the world, but try and keep cutting to a minimum. Depending on your layout, you would need to get a short replacement piece(s) of fuel hose. (Just take it with you to the auto parts store and they will match the size.)
NOTE: This van has a Bostig engine conversion, so the brown ground wire from the stock setup is not used. If your van uses this wire make sure you use it!


Step 4:
As mentioned before, if your pump comes with different electrical connectors, now is the time to install them. (If for some reason your connectors match your new pump you are good to go! You can skip to Step 5.)
The steps are simple:
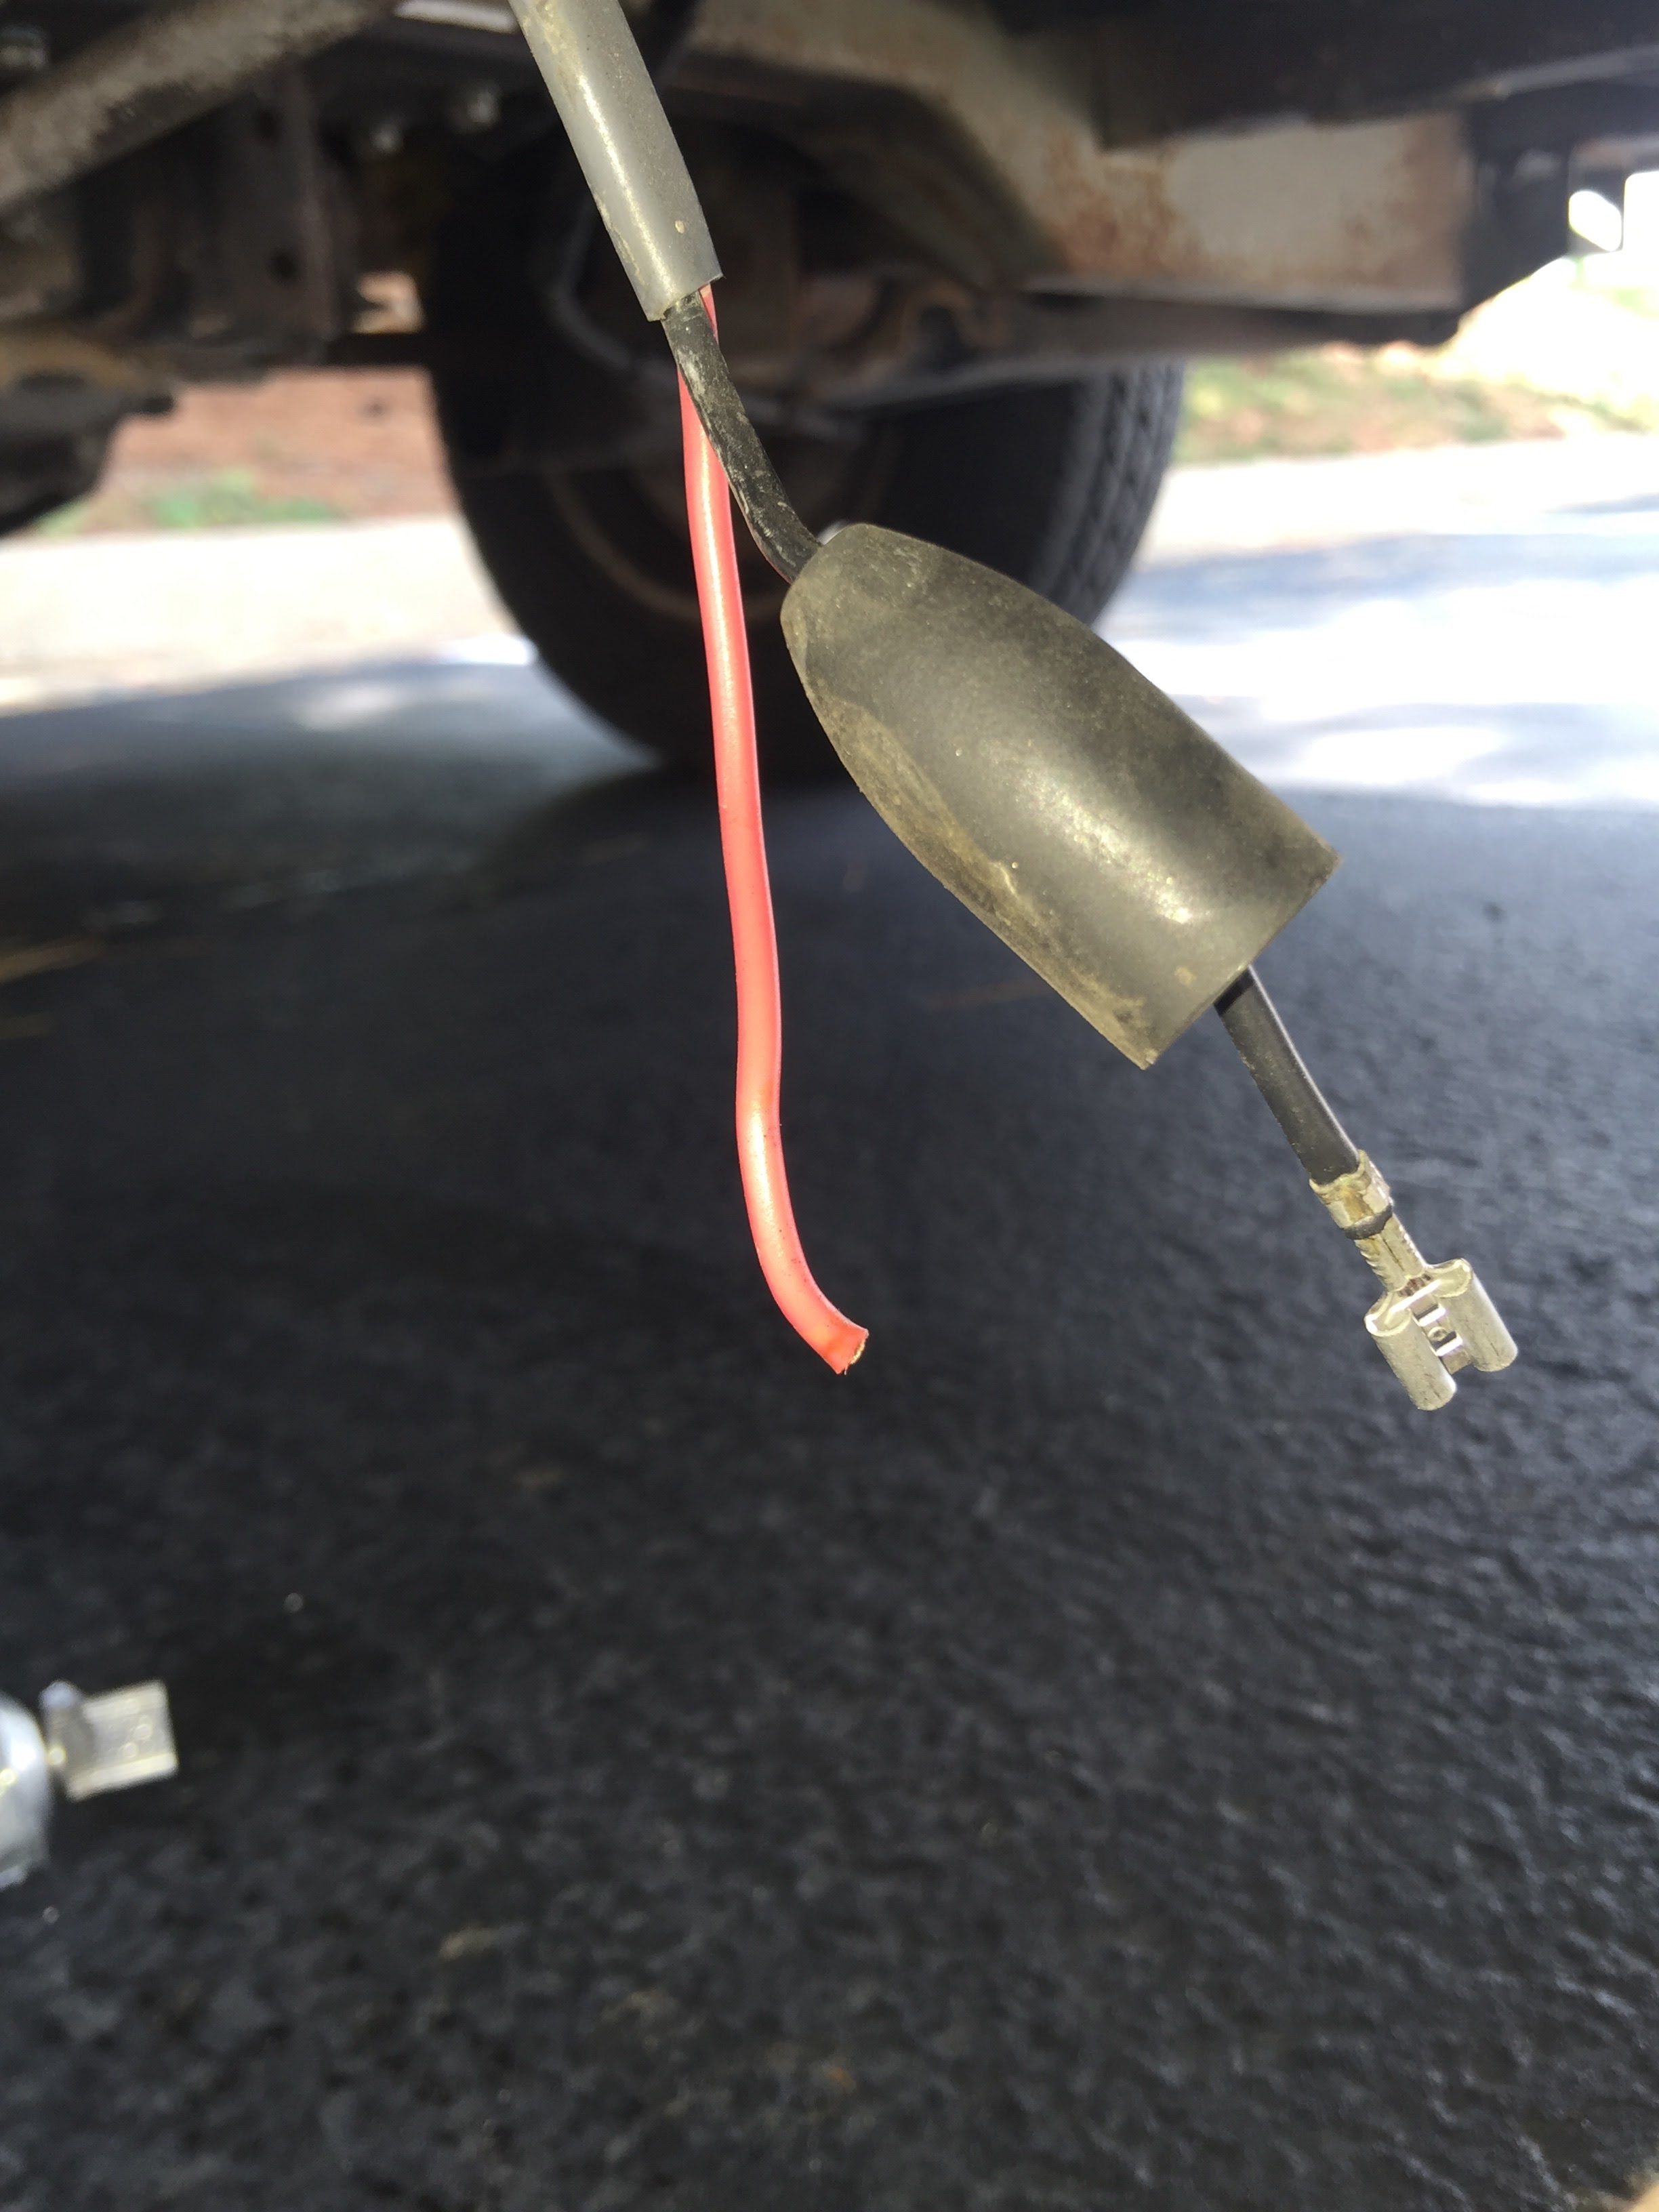
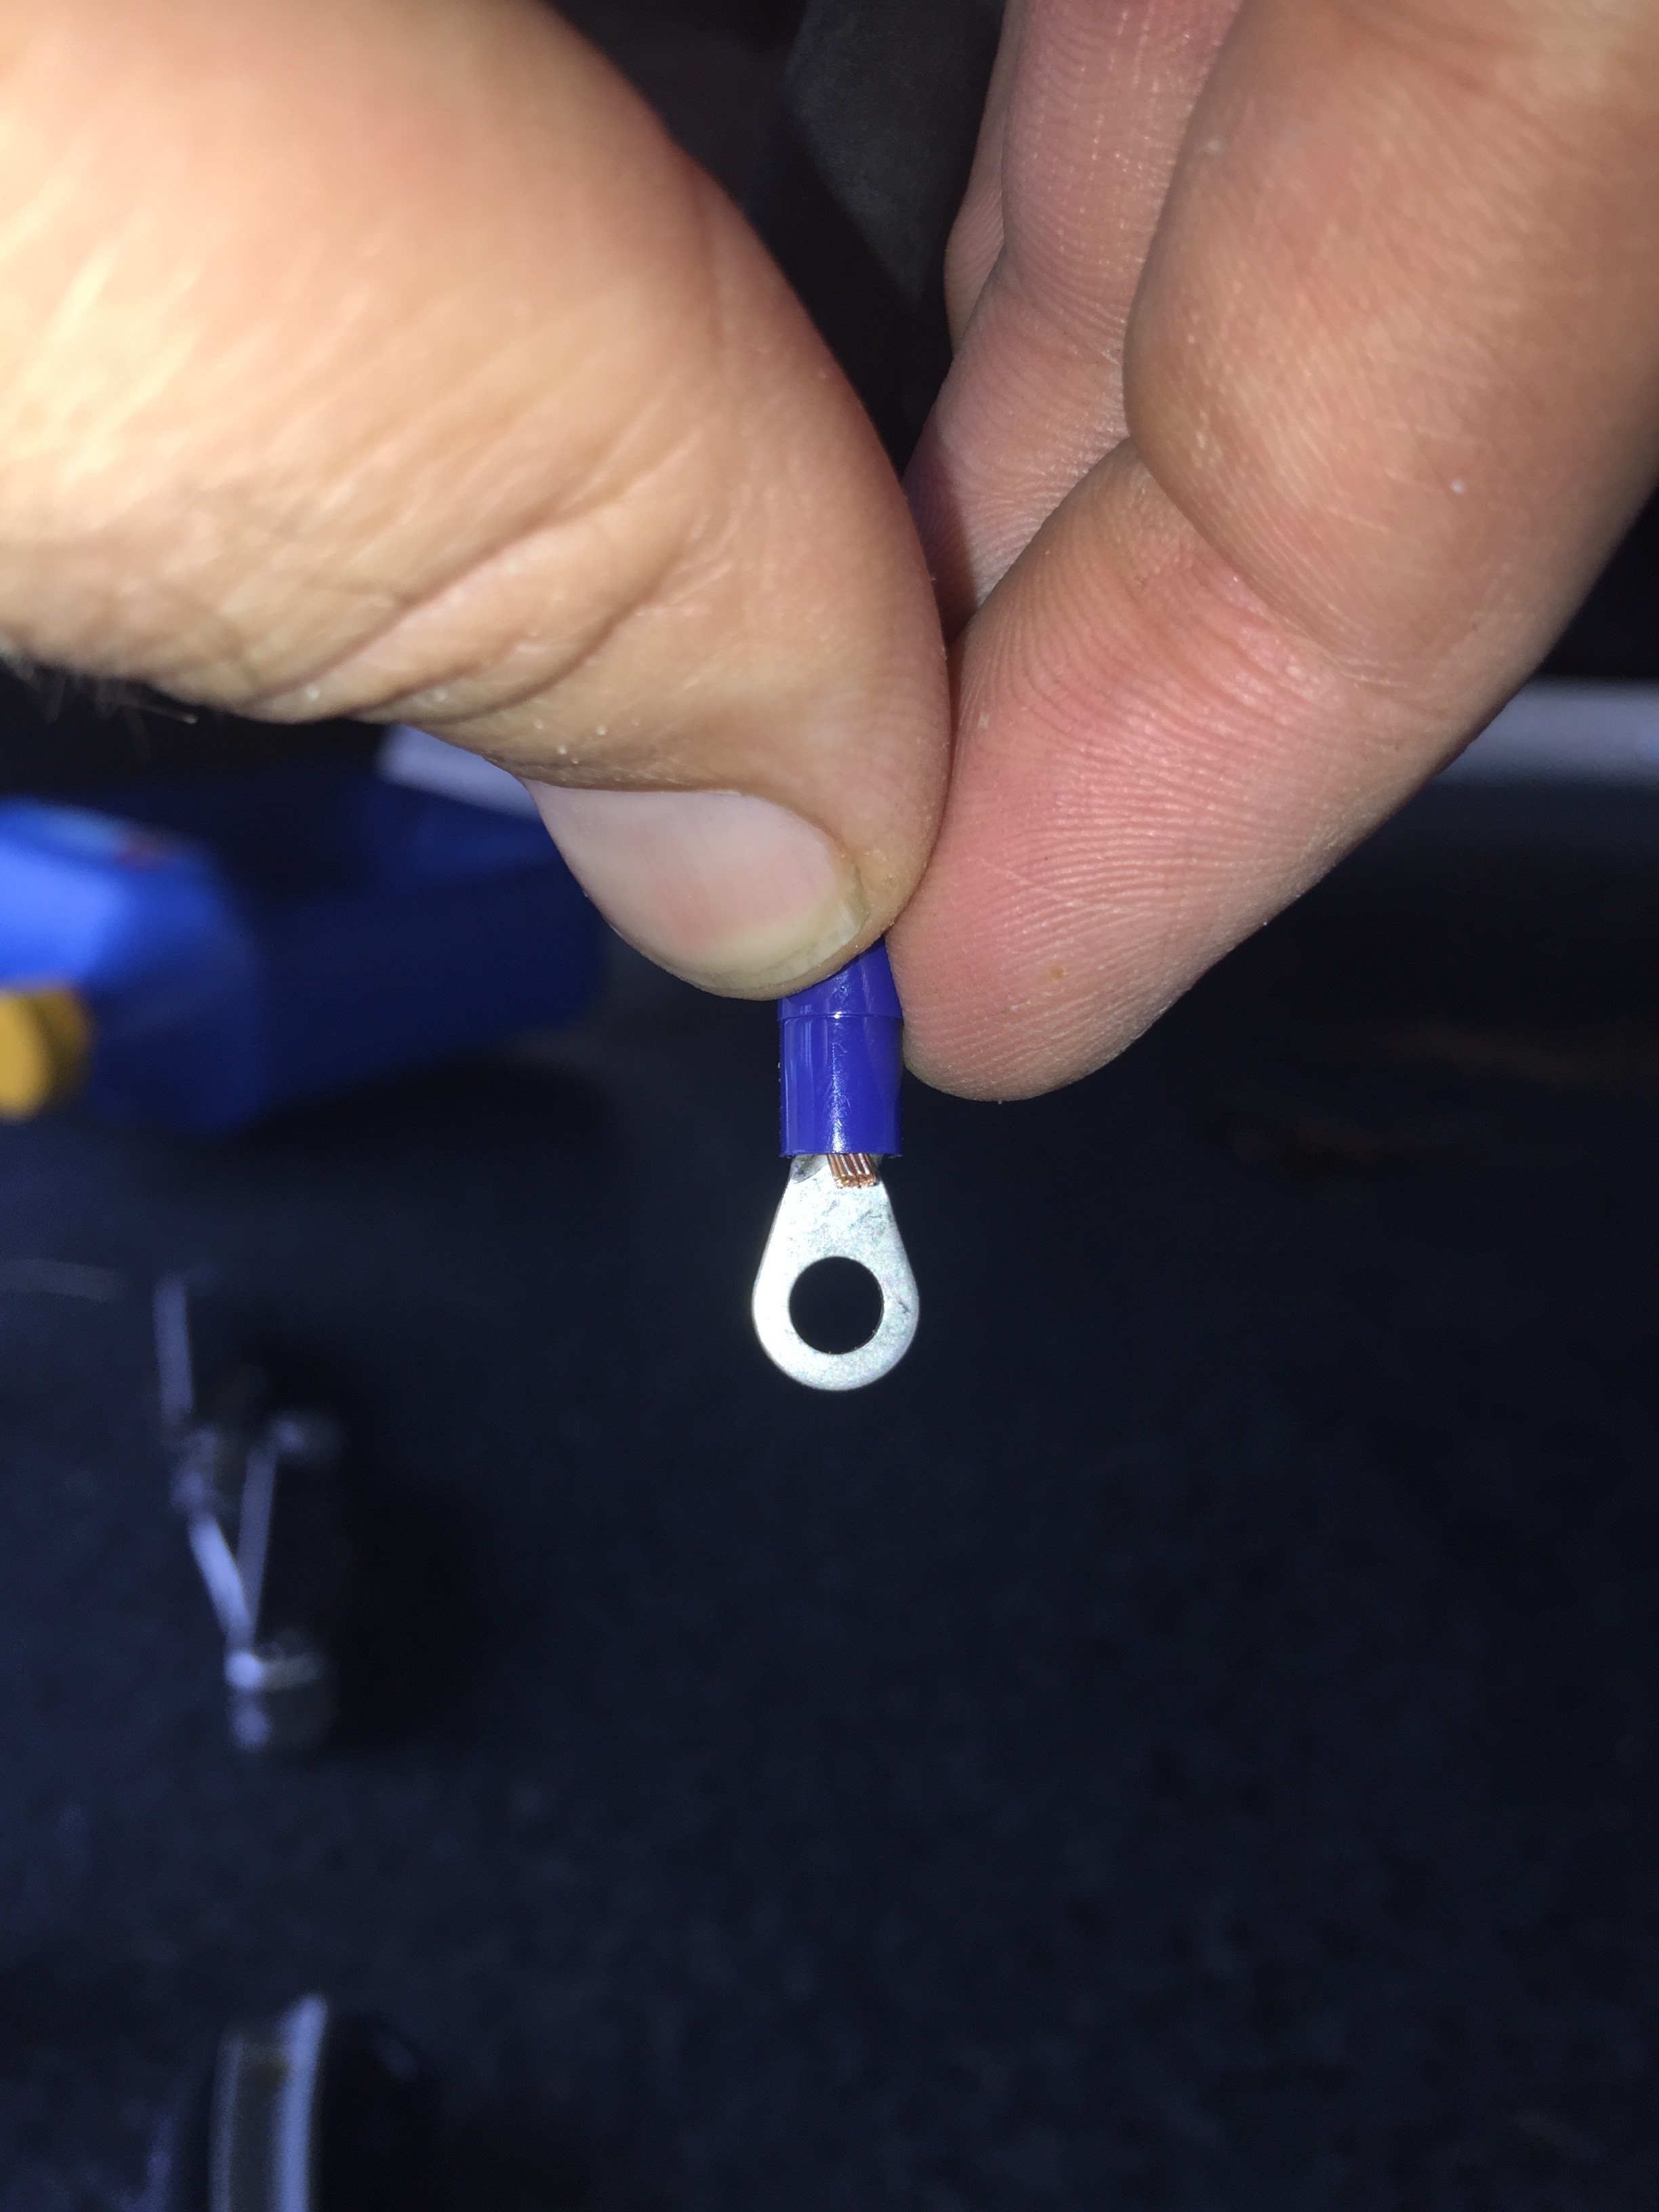
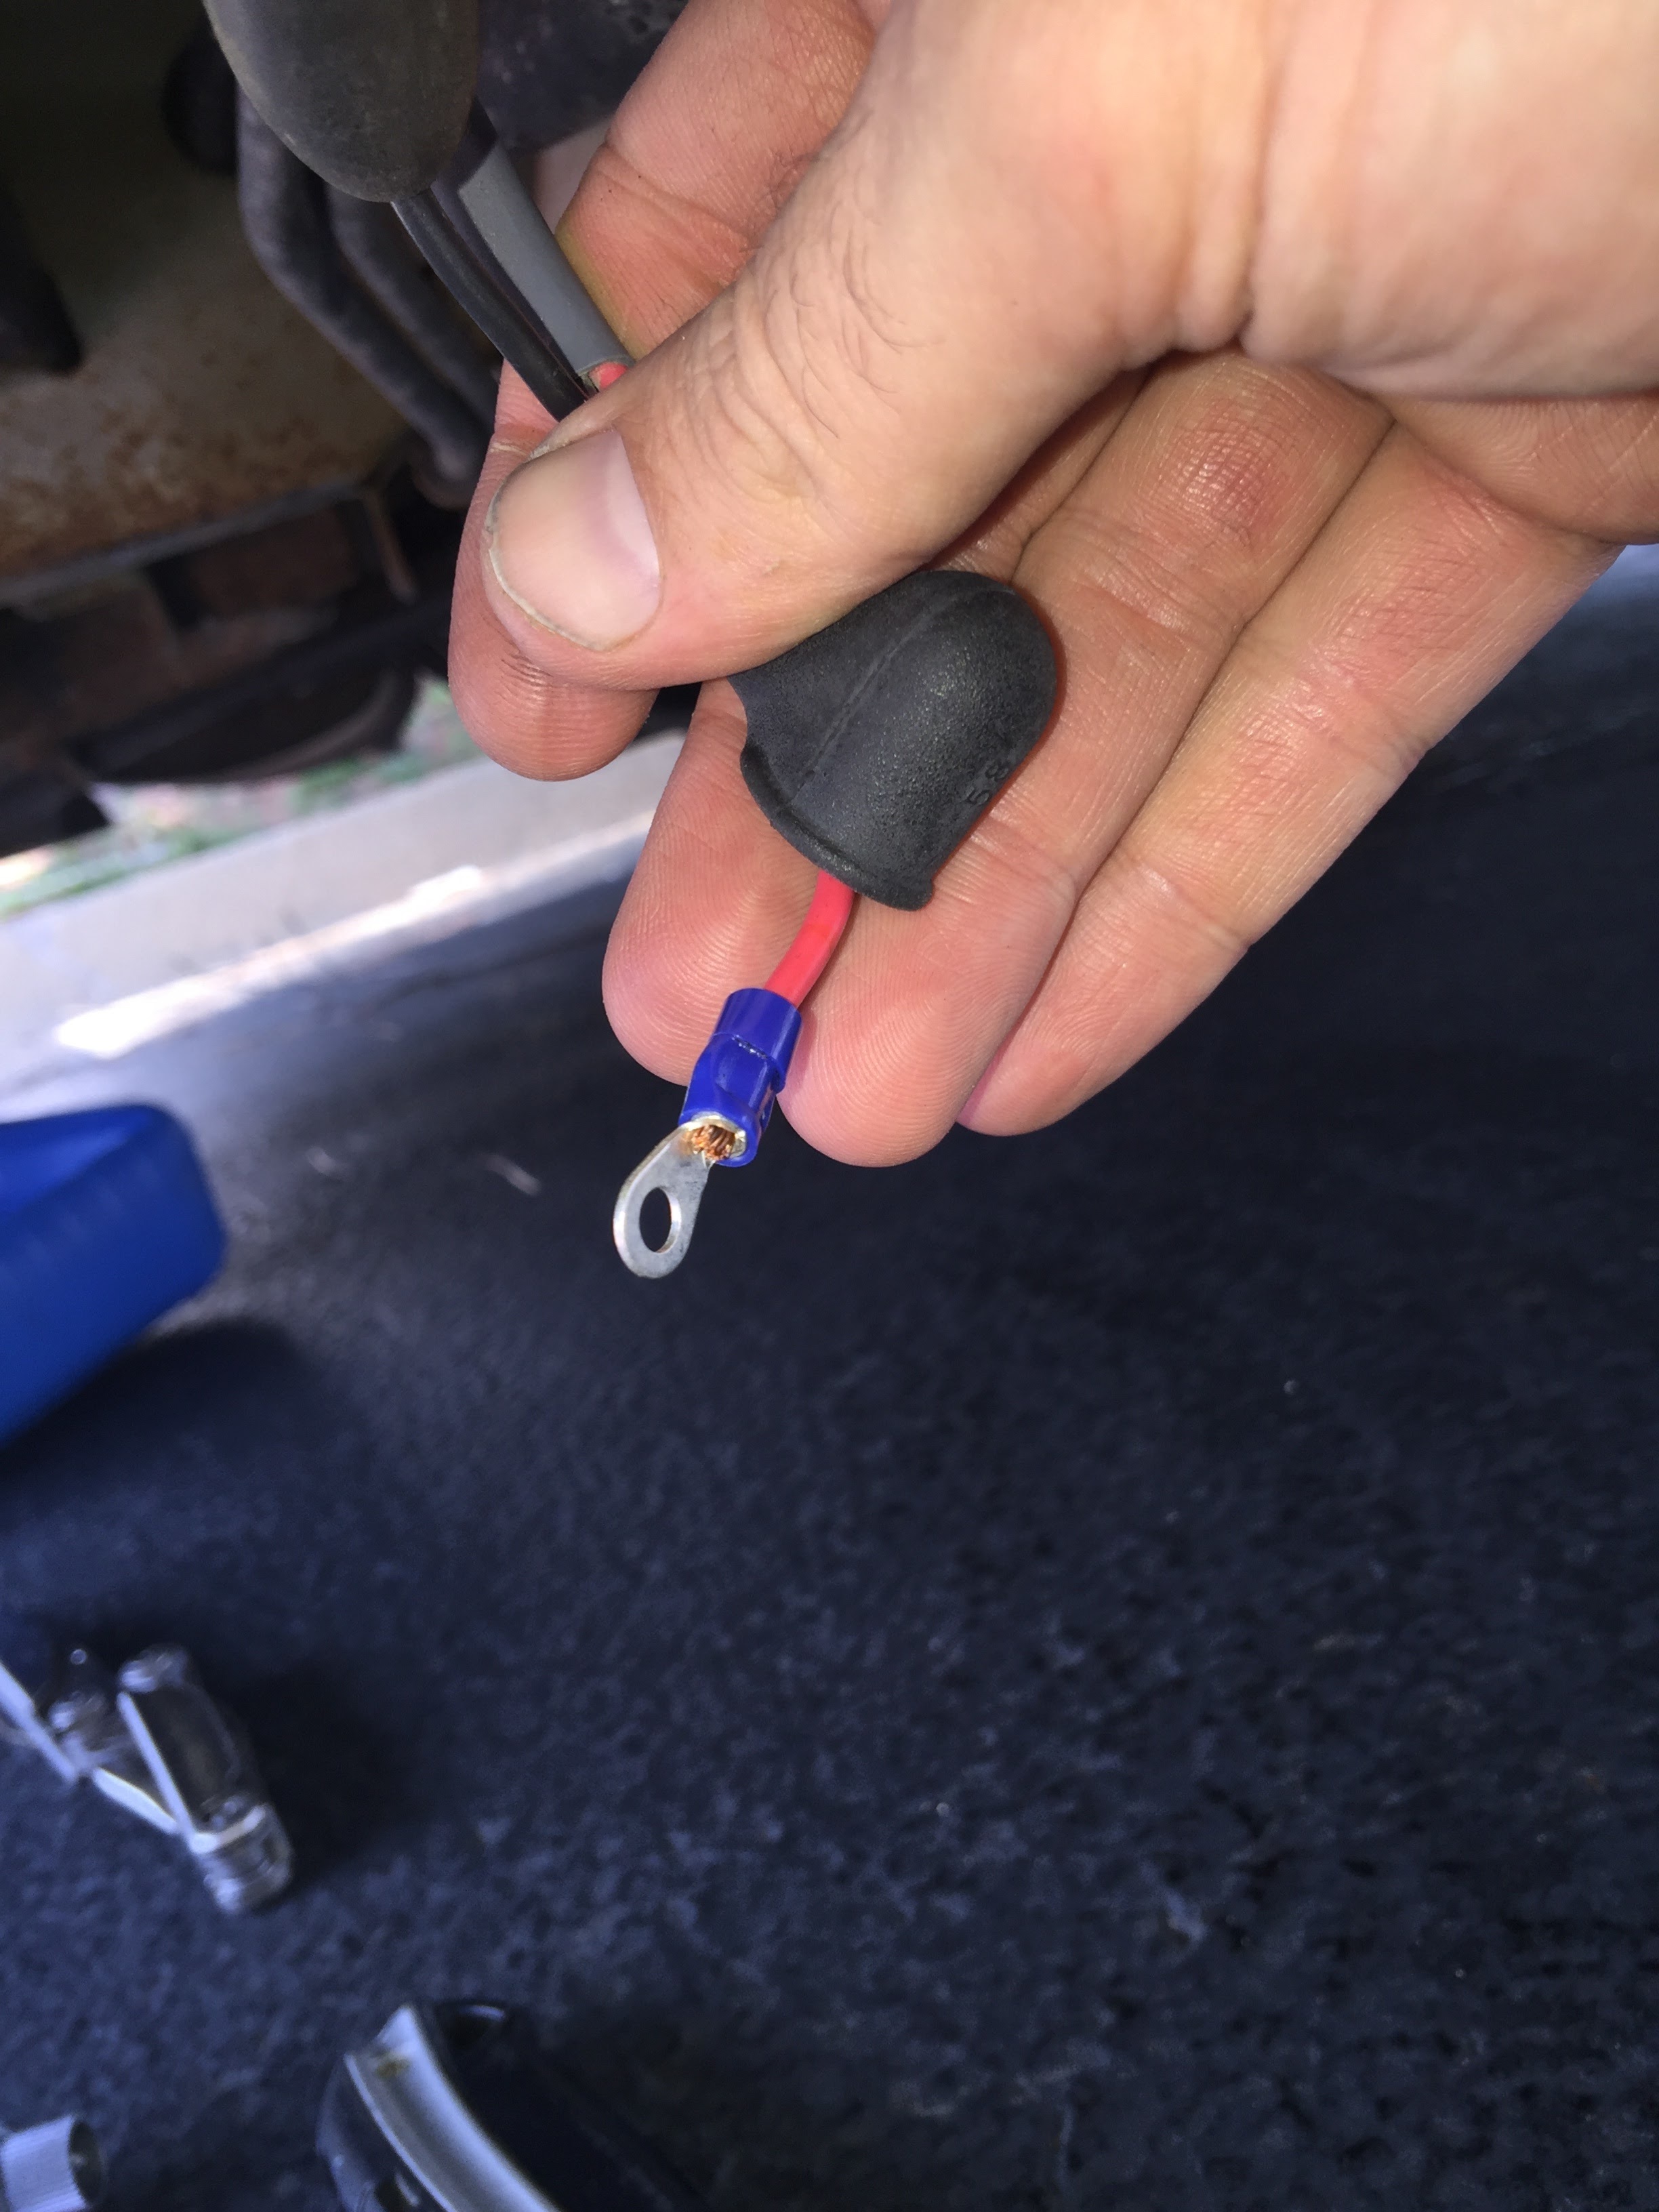
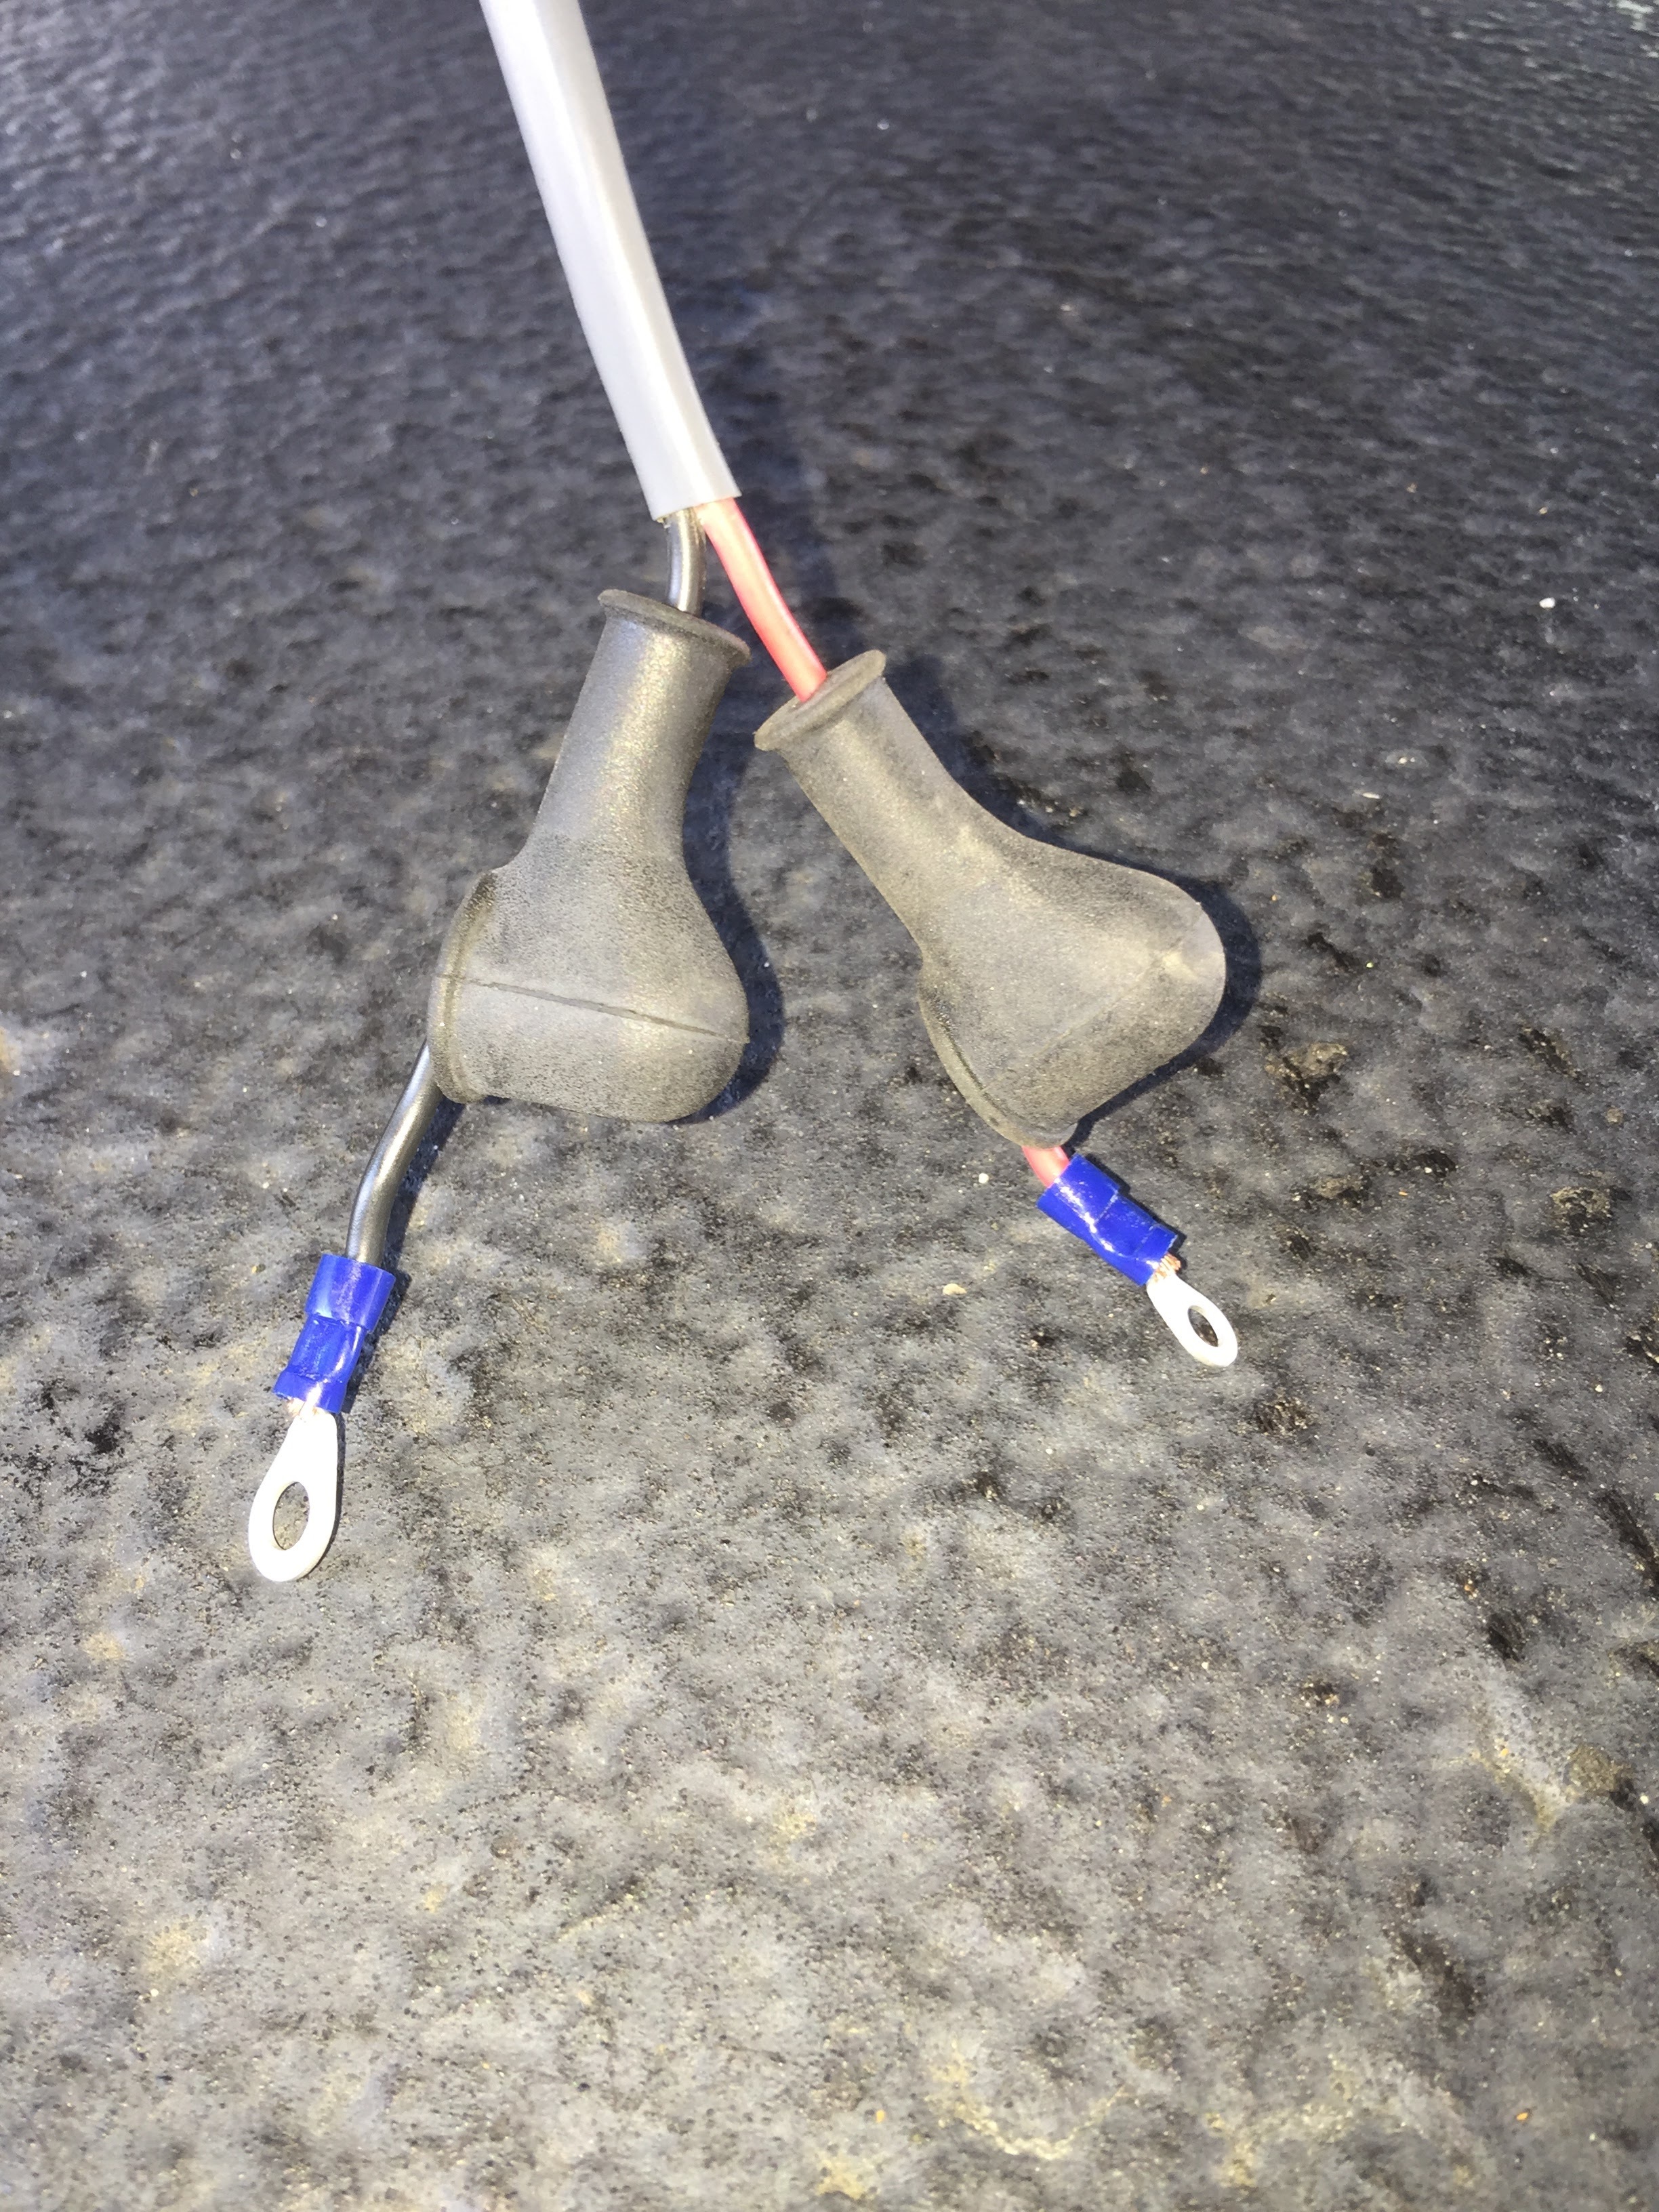
Cut off the original spade connectors.
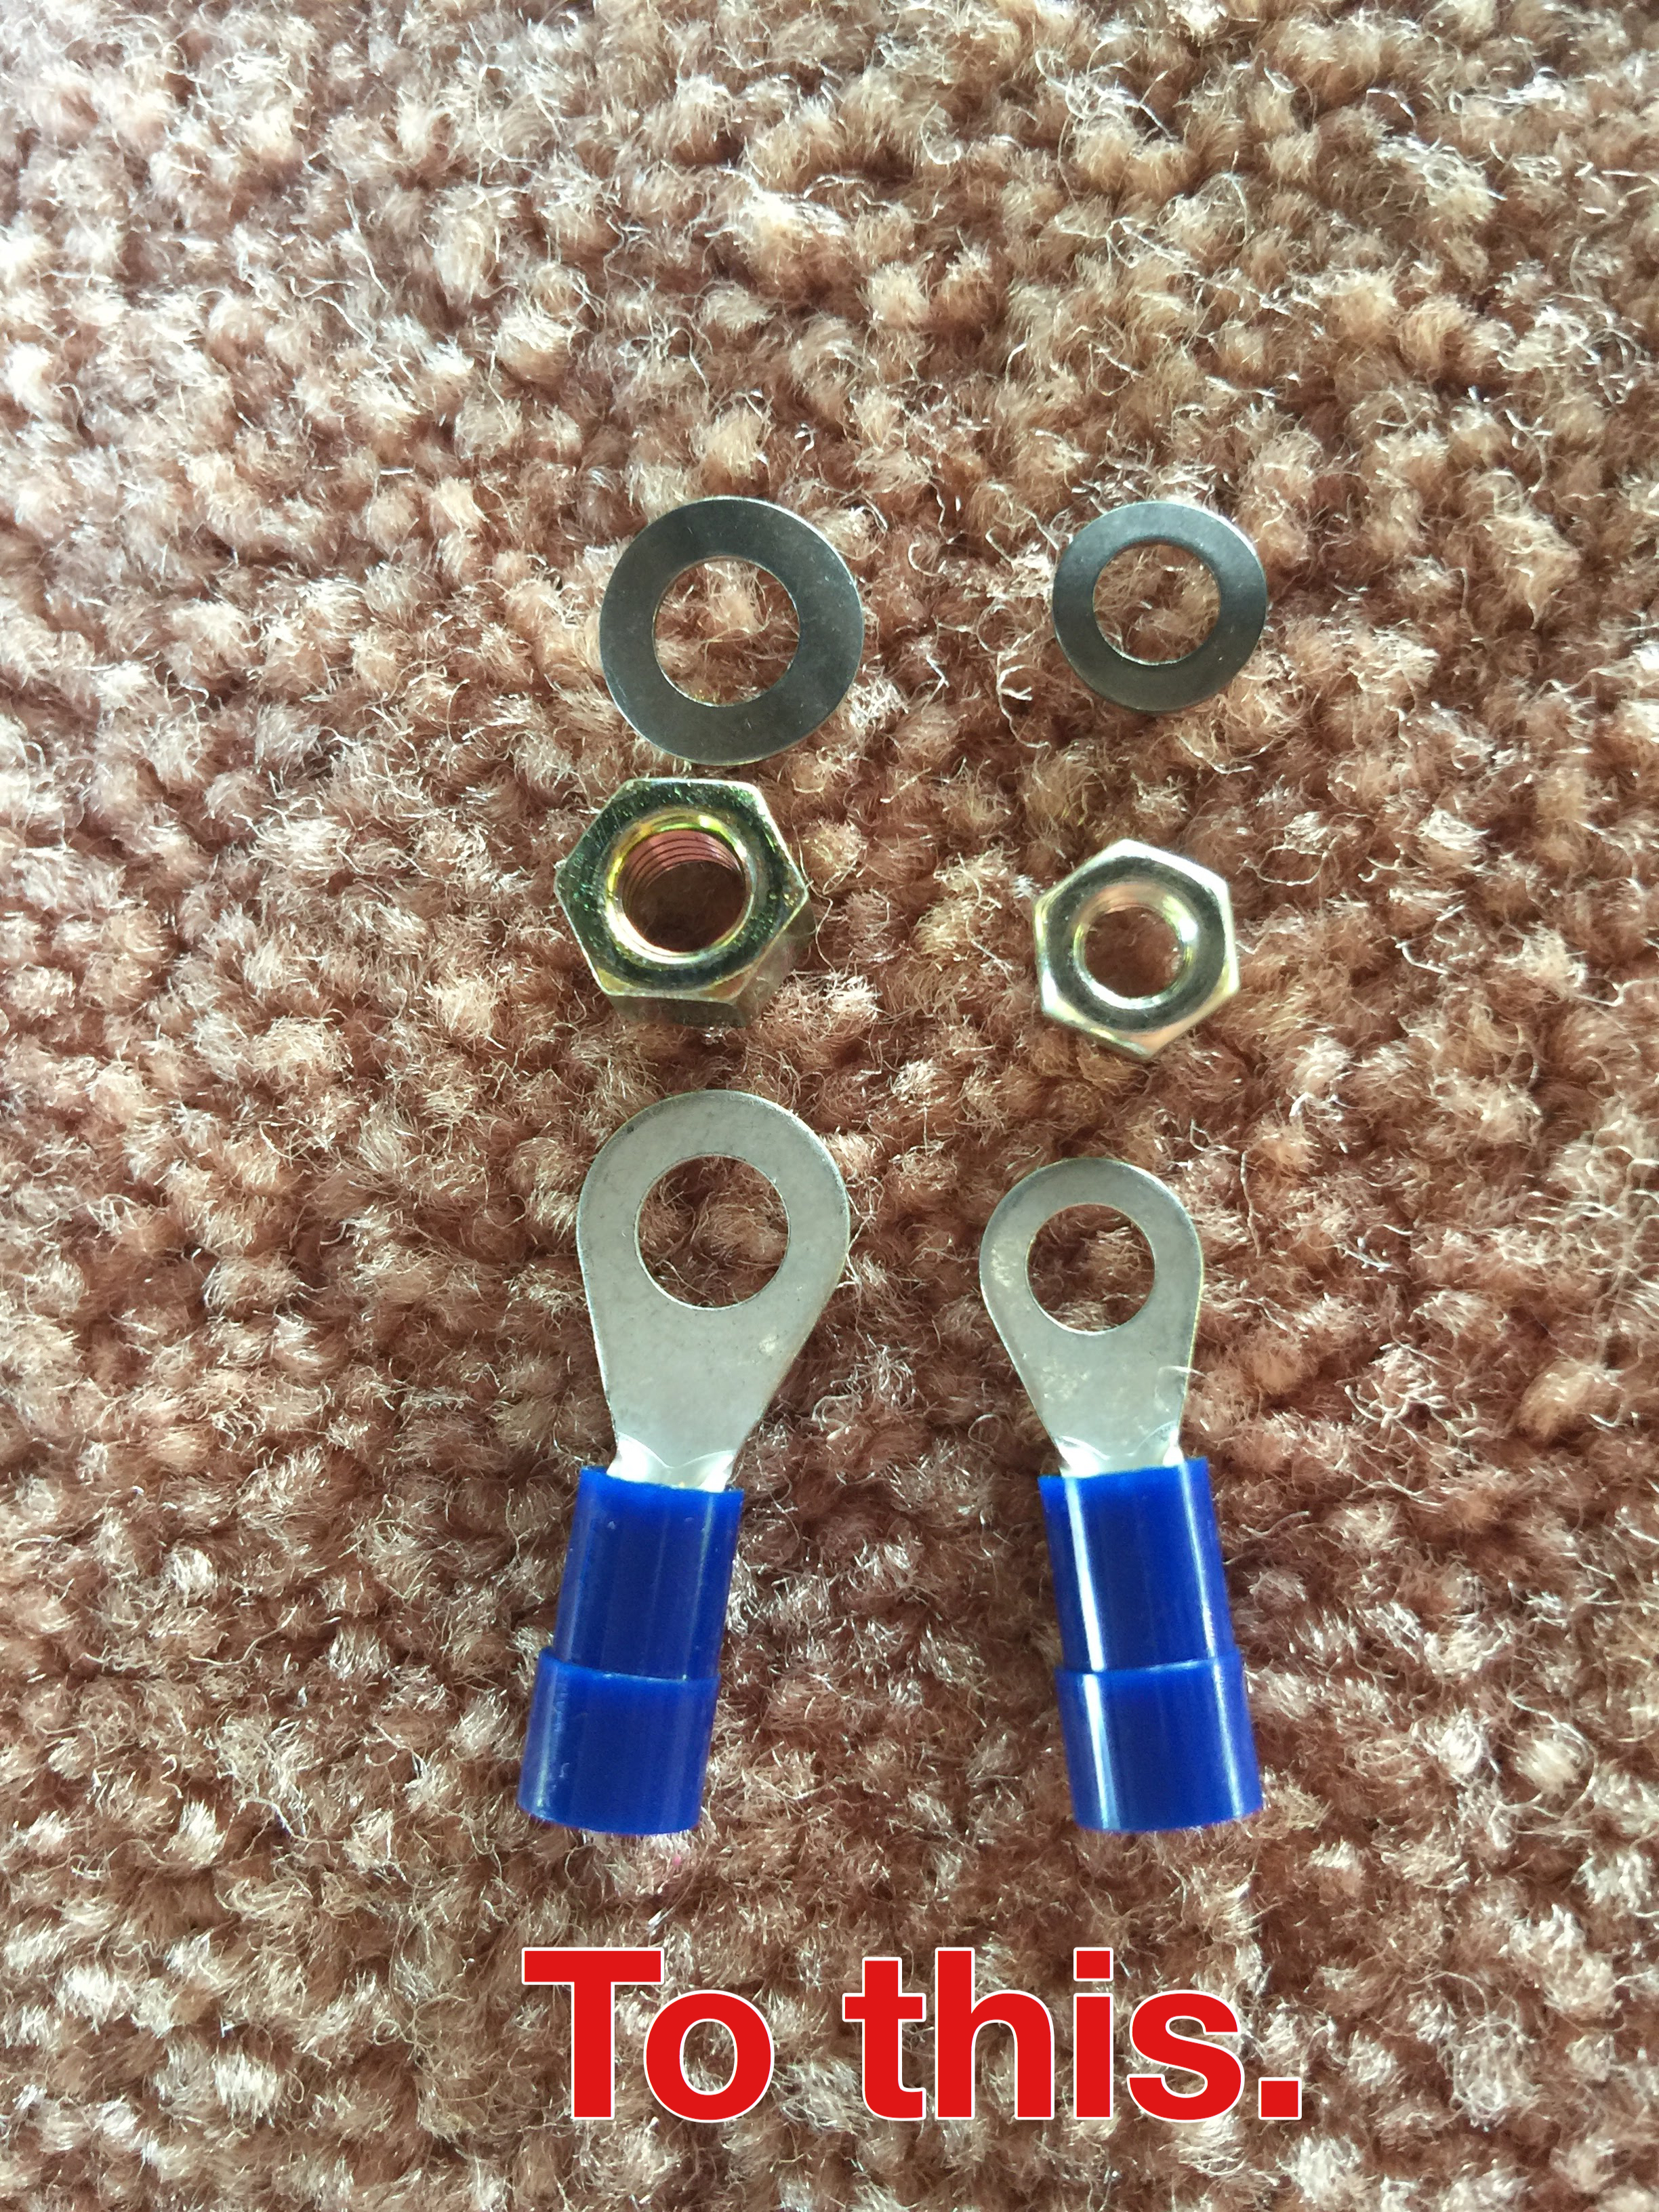
Thread the new rubber boots (if you have them) onto the wires.
Strip the wire ends.
Crimp the new eyelet connectors on.
NOTE: The two eyelets are different sizes! This helps prevent mixups when attaching to the pump. The small eyelet is for the positive wire (red), and the large eyelet is for the negative wire (brown or black). The pump has a "-" and a "+" molded into its housing, so you can verify the sizes before crimping.
If you mess this up you could potentially short-out your brand new pump (at the least you would have to source two more new eyelets), then you'll really hate yourself. Take an extra moment to double-check proper connections!
Step 5:
Install the new pump.
With the previous removal steps hopefully still fresh in your mind, this should be a piece of cake. You're just doing everything backwards:
Install the new pump into its mount.
Re-clamp the fuel hoses.


Step 6:
Attach the new electrical connectors. Assuming you did everything in Step 4 properly, this should be super straightforward. In this case, red is positive and black is negative. (Stock vans will have a brown for the negative/ground.)
Also, if I have dielectric grease on-hand I like to use some on the connections, but it's not required. (You can always do this later if you don't have any or change your mind.) Proper installation to each post on the pump is as follows: eyelet connector —> washer —> nut —> dielectric grease —> rubber boot.
Step 7:
Remove the clamp on the gas tank supply line!
Re-connect your battery.
Try and start the van. It will likely take a few extra cranks to start the first time, as there is now an air bubble in the fuel system that has to make its way out.
Step 8:
Properly dispose of any spilled gas in your catch pan and the old pump…you're good to go!